A wire brush sounds like it’d be perfect, and I was needing to head to Wilkos anyway. I’ll see if I can pick one up when I’m there!
I have been wondering about those rollers… The main thing putting me off them is that the brick size looks pretty irregular, which is great for doing older buildings and brick streets, but I think I’d prefer a more consistent pattern. It’s a good suggestion though
I love the details on Caits trousers! The mysterious stranger is very well done, the coat doesn’t look bland at all!
What about using these wooden coffee sticks for the wall panels? They are very cheap and can be used for a ton of other terrain stuff, like barricades, boarded-up windows, picket fences, etc.
I’m looking forward to your building. Your plans are inspiring!
Thankyou! I was wondering if anyone would notice that I’d done the chequered pattern on her trousers patches, I’m glad they’re visible
Wooden coffee sticks are what I’ll be using for the floor, they’re great for doing wooden planks I’ve found (as with the wooden barricades further up this thread). Not sure if they’d work so well for wooden panels, but I’ll keep them in mind
Awesome work! I really like the color transition on piper’s coat. Was it just a wash?
I was at Michael’s the other day and they were setting up their little Lemax Christmas Village. One of the things is a brick mat to use as a base. It may work for you if you have a Michael’s or similar craft store near you. https://www.michaels.com/lemax-brick-mat/10598424.html
It was a layer and a wash, then three or four glazes (each mixed to be slightly lighter than the previous one) and a slight brown drybrush along the hem for dirt
Ooh, that brick mat is interesting, I’ll have to have a look to see if I can find anything similar!
I’ve been working on some non Fallout related projects for a while, while trying to think about how to minimise the cost of this terrain piece I’m planning without reducing the quality. I think foamed pvc is the answer!
A while back I accidentally bought some when I meant to buy some regular foamboard. It sat at the bottom of my modelling supplies for a time, before I decided to take some out and have a mess around with it to see what its properties were like. Whereas foamboard is a light foam sandwiched between two sheets of card (cheap and useful for forming basic structures, but difficult to carve detailed patterns into), foamed pvc is much denser. The foam is firmer, so it doesn’t have layers of card on the outside, and can be carved and shaped quite easily. This means I can (hopefully) carve a brick pattern into it without needing to buy any embossed sheets or anything.
I’ve ordered some more from GSW (link if anyone’s interested: http://www.greenstuffworld.com/en/138-foamed-pvc ), but while that’s on it’s way I thought I’d “break ground” on the other parts of the project.
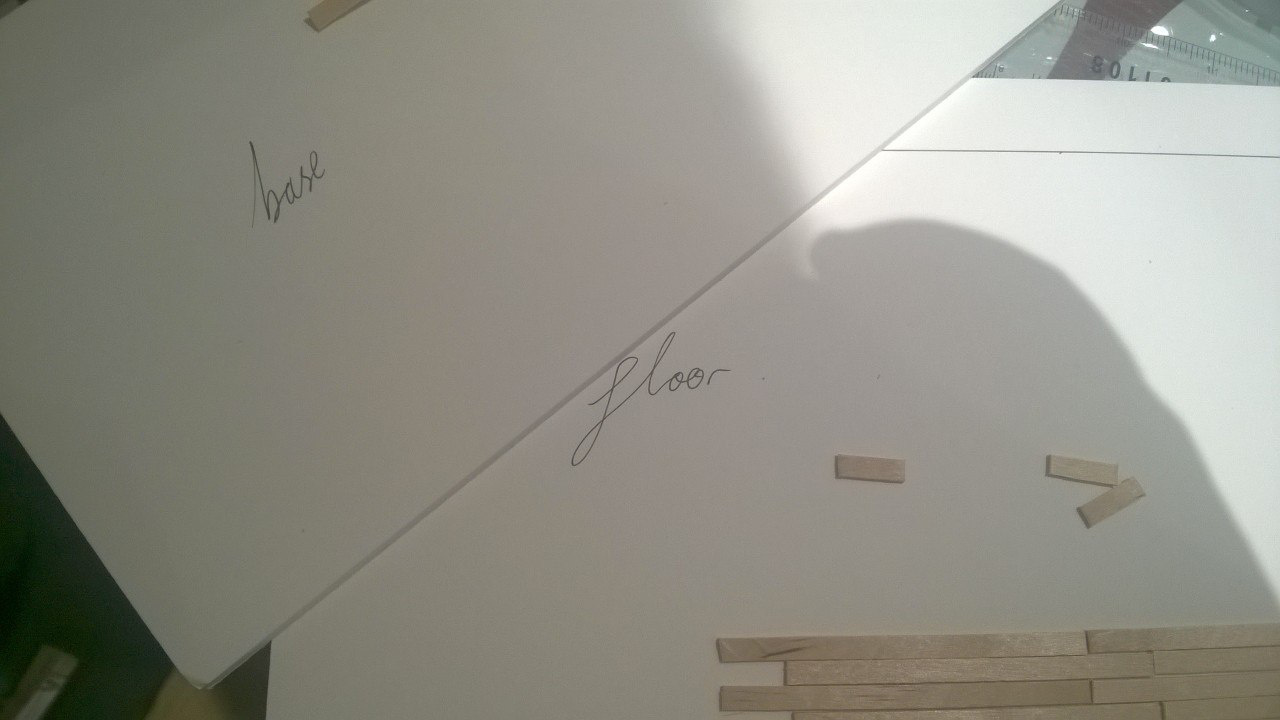
This was the first sketch I made to plan the top down layout:
I’ve since decided to knock a few centimetres off the dimensions though, to allow me to cut off the slightly damaged edges of the foamed pvc I’ve already got and use them. It’ll still have things like the fire escape and damaged wall section, just didn’t draw them onto this diagram. Upon cutting the base, I also enlarged the interior width from 14cm to 16cm just to give a little more space for things on the inside.
Thanks! It’ll take a range of skills I learned on previous projects, plus a few new ones I haven’t tried before, but it should be a fun challenge!
I did a bit of work on making the wooden flooring last night (though still needs to be coloured and weathered of course), and put a raider in the corner for scale:
Oooh! I’m looking forward to seeing how this comes together
That planning is far more detailed than mine, I normally just go for a quick sketch and a few dimensions and then everything else gets done on the fly. I’m not a very organised person!
I’ve ran out of foamed PVC so I’m looking for a new supplier, unfortuantely the GSW sheets are the wrong thickness and size for what I need… Although for buildings not 1 ft by 1ft tiles that is a great source and price!
Thanks! I’ll make sure to keep this thread updated as I make progress
Haha, usually I’m the same, but I thought I’d try making more detailed plans this time to help remember everything. There’ll likely be more deviations from them as I go along though, such as the change to the width above!
Hmm, not sure I know anywhere that’d sell larger sections of it, but I’ll let you know if I come across any. For making basic shapes and structures I think the slightly cheaper foamboard works fine, but for anything you’re wanting to put surface detail on I’d say it’s worth getting foamed pvc
Until I see the size of everything I can’t visualise how it’ll look overall and how it will fit together so changes are inevitable. Plus I’m really just not organised enough to plan things out
I think I’m going to have to get it from “proper” plastic or architectural suppliers, I need to start looking on google! I use it for the base of my tiles since it’s easy to cut, can be textured and detailed but has a reasonable amount of rigidity and now I’ve started I have to stick with it!
Finished the flooring, cutting all of the planks to size and then laying them out in the right pattern. Next up were the windows, made with plasticard. I’m experimenting with using a sheet of clear acetate (came as part of the packaging protection for something a while back, held onto it for projects like this) to make ‘glass’ for some of them, any feedback would be appreciated as always
Finally, my first attempt at making a door! It’s a 42 by 22 mm rectangle of 2mm foamed pvc, which I’ve tried to carve a pattern in to using my normal sculpting tools. Still need to add a handle/doorknob, which I’ll probably do with either plasticard or greenstuff
You might be able to use wire or pins embedded in the window frame pretty much invisibly and then add the magnet to the back of the boards. It might be a bit of lump on there but you shouldn’t see it when it was on the window
Been busy with mass effect minis for the last month or so, but managed to take a couple of pictures of my fallout stuff I thought people might like I’m also still working on the terrain piece, but it’s difficult to find motivation without a gaming group at the moment
I know I said I would never hand carve bricks again, but the website where I ordered the embossed sheet brick pattern from last time has a minimum order charge higher than my budget for this build. So, hand carving bricks it is! Hopefully the pattern still looks good.
Yeah mdf kits look like a great way to fill a table with terrain, but I’ve never been sure they have the detail I’d like. I figure I’m happy to spent the time doing things by hand if it saves a few quid and gets a better look, but I totally get why people like mdf


 Although for buildings not 1 ft by 1ft tiles that is a great source and price!


 It does look waaaaay better though!