Been working on an overpass the last couple of days. Going to do a grand total of four pieces. This one will be the only one I intend to do as two levels, the others will just be a single level.
Size:
22 inches long
7 inches wide
13 inches tall
The two Corvega on the top are the official ones. And yes, that’s a Behemoth on the middle level.
The goal was to give enough clearance to field any model except Liberty Prime on any level
This was made with one sheet of foamcore, a little wire that I cut up to make look like rebar, and took two hot glue sticks to plaster it all together. REALLY happy with how it’s turning out so far. I plan to do a single level one with an on/off ramp, and one that’s just a simple single level one.
On a little side note, I’m going to do another layer or two of foamcore for the supports, add a bit of strength to it, one behind and one in front of what you see there.
7 Likes
It’s huge! Should really add some height to the table it’s on 
1 Like
I want to do an on/off ramp and a single level straight piece so I can mix and match them on the table. (So, at least three at items at the length of the above. at 22 inches long, two of them would nearly cross a 4x4 table) I’m also planning to do a scratch build to make one of those elevator things you see in the game as an alternate way up.
On a side note, anyone else having trouble logging in to the online store? I can purchase without a login, but for some reason the store won’t let me log in properly?
1 Like
Coming along nicely! Still needs weathering, but really happy with it so far.
3 Likes
Ramps and elevators sound like a good idea!
Looking forward to seeing it weathered 
1 Like
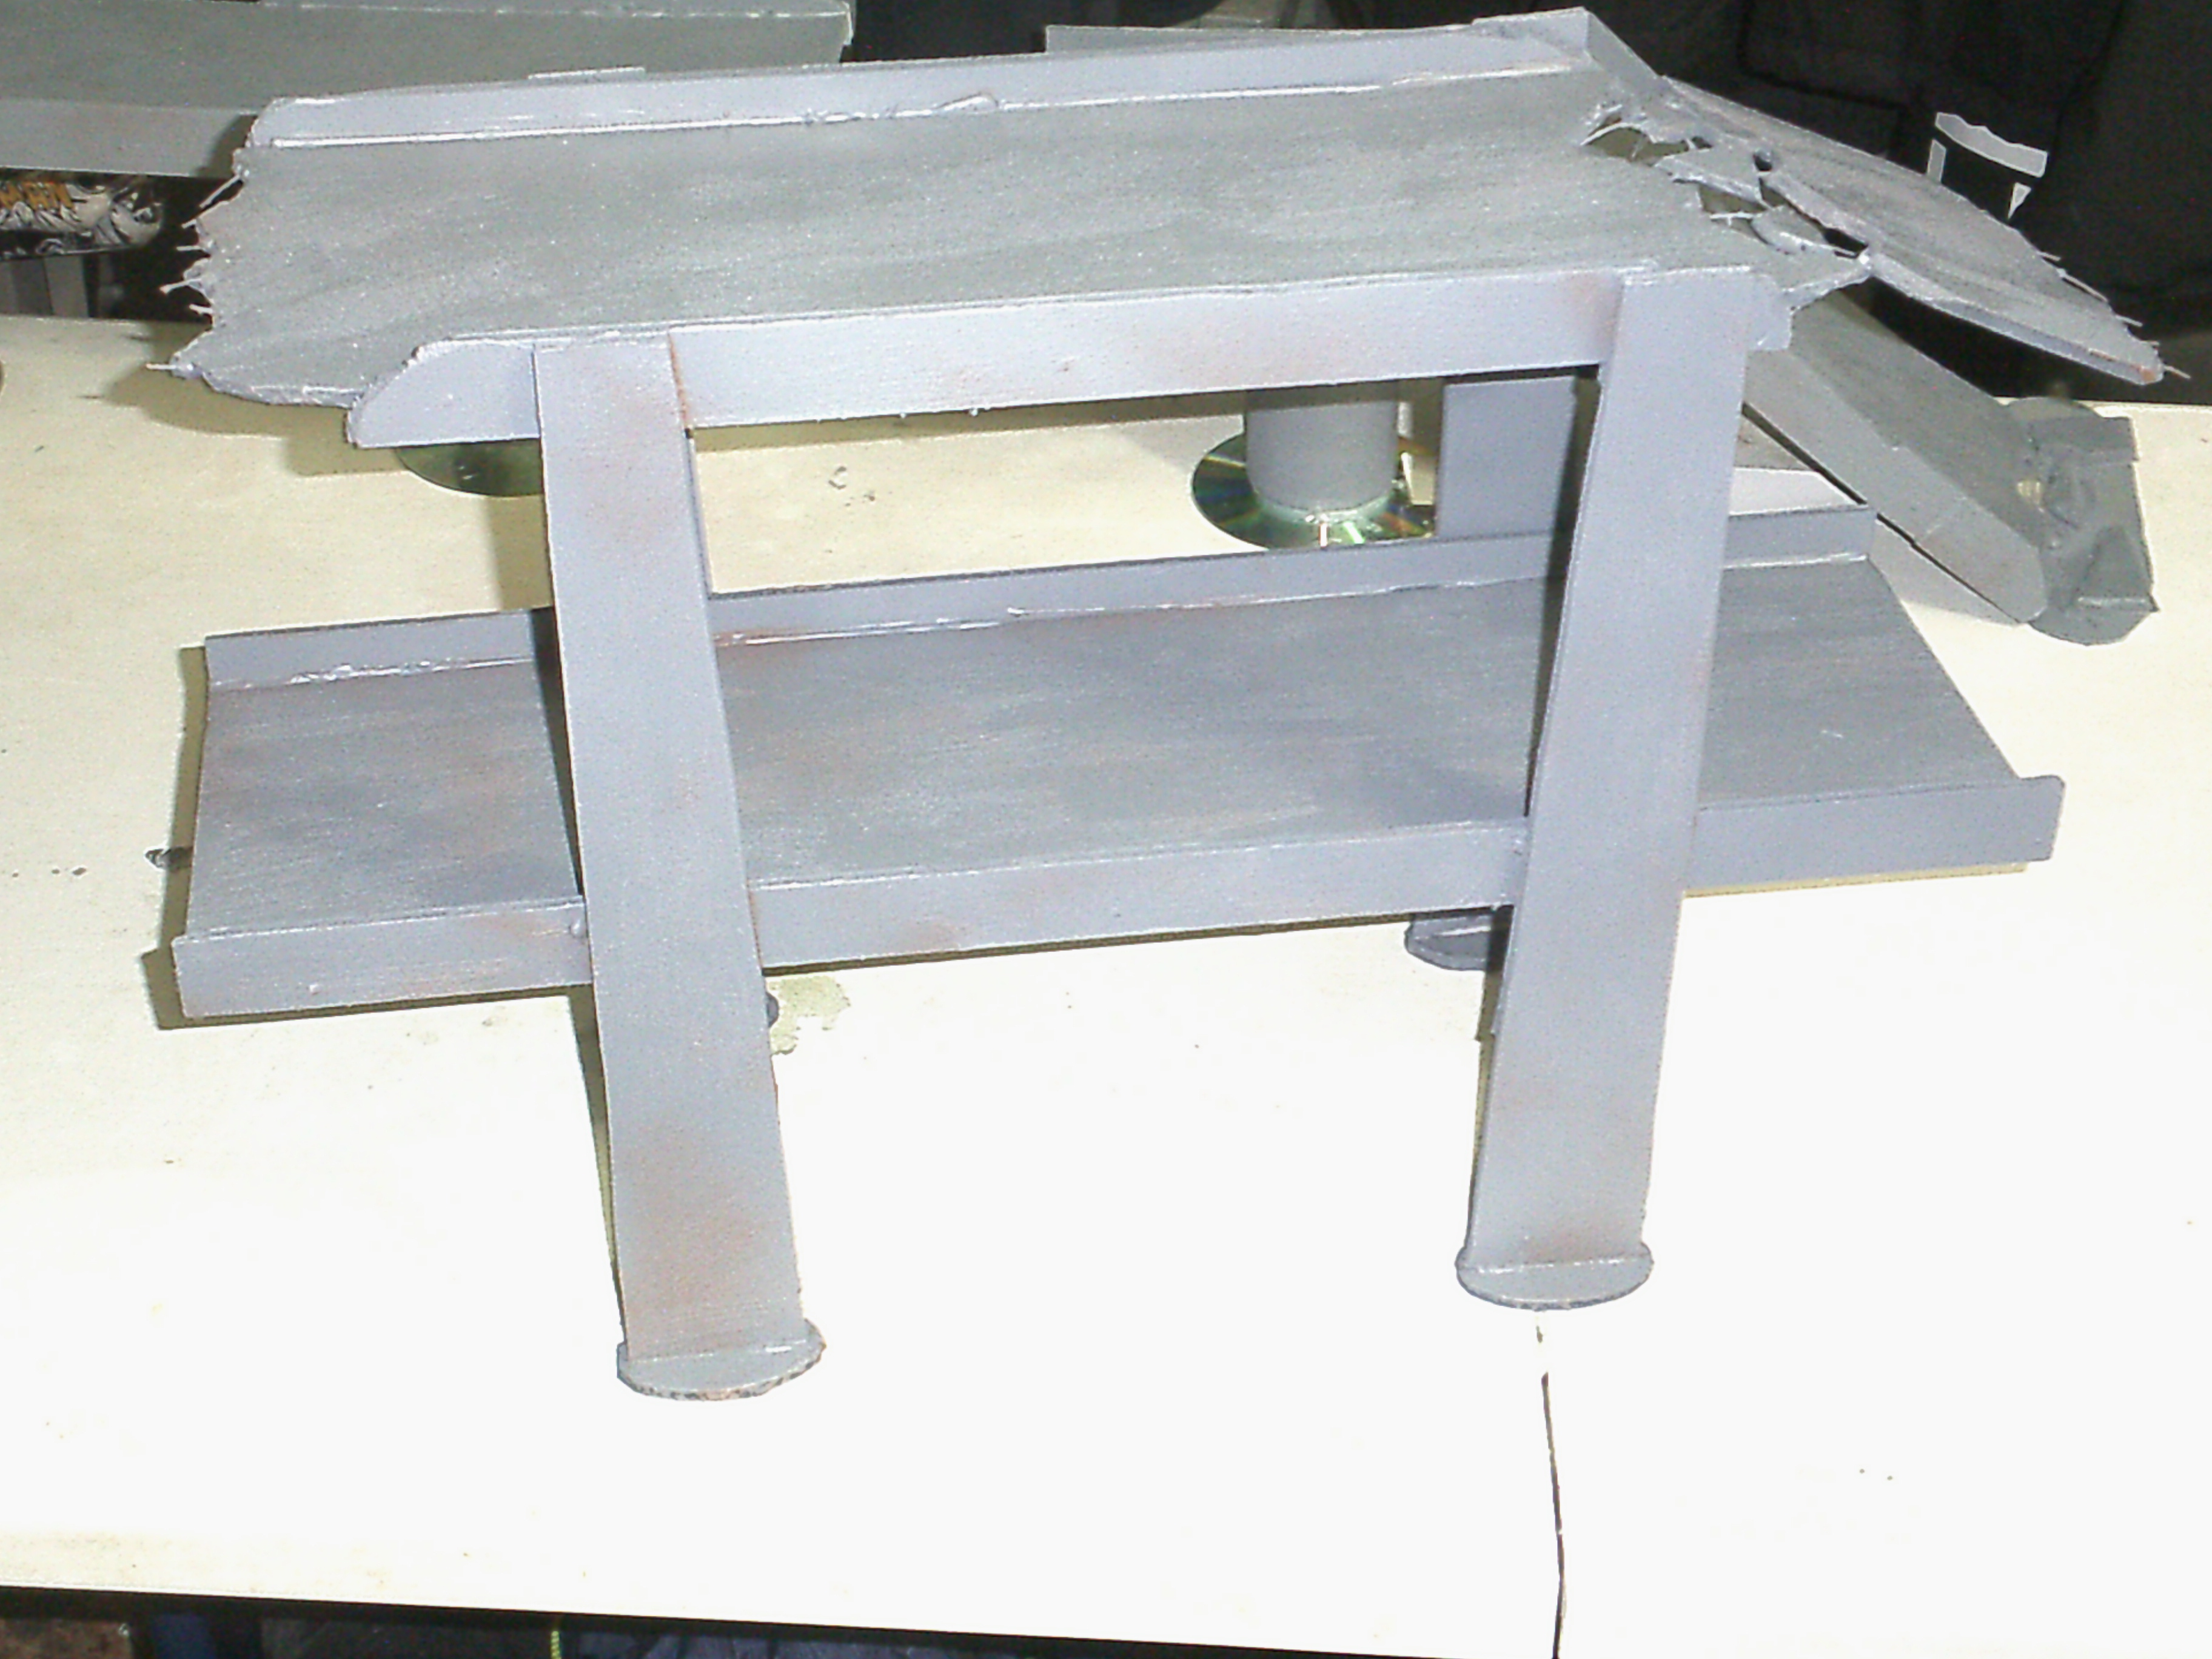
I have some old sprues that almost perfectly match the supports for the elevators that I cut out yesterday. I also started building some wooden steps as a sort of counterweight for the elevator so it wont just fall over the edge. I’m going to do two of the elevators. Placing one on each level will make it look like one big elevator. Alternately I’ll be able to set up two elevators. I measured the width of the stair platform so that once I build the elevator itself, I should be able to fit up to three standard sized models on the elevator at one time
The height is planned out for the first level of the overpass. It’s actually around an inch shorter than a three story TTCombat building. This will allow me to run a small ramp from the overpass to the roofs of both two and three story buildings.
I want to do one segment of road that includes an on/off ramp as a way up. Alternately, I might do a collapsed section of overpass that can be climbed.
I’ve also been thinking about making some form of wooden structure that can be climbed which can be sat on either the ground or on the first floor of the overpass.
Between all of those, we should have plenty of options to get up and down. My thinking is that it would work best to include two ways up/down during play.
2 Likes
That is some really good work! These look really good. I can’t wait to play on these. Going to need some more vehicles! – Oh… Maybe a crashed one that has taken a header of the end of a ramp! May have to mod something together.
1 Like
I think we’ll be ok for vehicles, I have five of the corvega and probably twice that many other vehicles… The thought of setting up some accidents on the highway is really fun though.
I just picked up the materials to do a bunch more stuff like this. I’m really having a lot of fun working with the foamcore.
Foamcore’s a great material material to work with, I use it as the base for a lot of projects myself
Having ways to connect the overpass with nearby buildings should be brilliant as well, it’ll allow you to have a proper three dimensional gaming area
1 Like
Got a bit of an update on the overpass segments.
Materials:
Two sheets of foamcore: $1.76
Less than a foot of drywall tape: (3 roll, probably used 2% of it.): +/- .10
Five soda cans: (Something I would have drank anyway. Oversized cans: Free
One gallon textured paint: (15 can, but barely used any of it. Going to be generous and say I used 5%) .75
About 10 glue sticks (20 pack for $1.99): $1
One can of gray primer: $2
Total materials for all four: $5.61
Going to count that as a win.
I’m going to make one more really short one that’s a broken section sort of like the double layered where I have the chunk sort of sagging toward the ground. Only I want to do it as a single level piece. That way I’ll have three broken pieces that can act as end segments for the highway. That in turn will allow me a lot of options to mix and match in order to use them during play. Even just the four pieces give a lot of options for how to configure things though.
NOTE: These pictures were taken right before I put a coat of the textured paint on all of these. They’re wet still at the time I’m posting this.
At this point (I just finished painting the textured paint onto all of them) I need to let them dry, I need to use some blank CDs as stands under the soda can pillars (For stability. The wider bases will make it harder to knock them down.), and I need to give them a quick coat of gray so the color is right. I don’t know if I’ll get them finished tomorrow night or not, but either way I should have them done by the end of this weekend.
@robhistory I’m thinking a highway themed map next time you’re over for a game? 
4 Likes
That’s looking great!
It’s probably too late now but would putting some sand in the can before you attach it help weight them down and improve stability?
2 Likes
That’s a great idea that never even crossed my mind. And you’re right, it’s a bit late to do that now. 
1 Like
Gatekeeper, how about: punch a hole in the bottom of each can; use funnel to add sand; seal hole afterwards.
1 Like
Not a bad idea.
Right now, it feels fairly solid without any additional weight. I think I’ll keep them as-is for now, but if we have any trouble with it falling, then I’ll likely consider doing something like that.
Well, still need to decorate the bases a little, but they’re mostly done.
The textured paint was a bit of a mixed bag. On the one hand it added an almost perfect grit to the roads. On the other it shrunk slightly when it dried and gave the whole thing a slight curl. All said and done, I’m thrilled with how they look.
Only thing I intend to do at this point is “rust” the rebar and make put something on the CDs I used as bases to make it look like dirt. Should be really simple work.
4 Likes
Awesome work as usual. May have to steal some of these ideas.
Go for it! Would love to see what you come up with!
I figure a few jersey barriers and vehicles on the table will break line of sight and such REALLY nicely during play Also working on some elevators to get characters up and down. That;s going to be pretty fun.
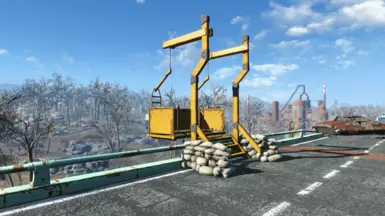
Using this as a template of sorts
I have this much done:
The plastic bits I still need to cut down a bit, but they’re part of a sprue from an Avatars of War: Dwarf Berserkers Regiment box. I was pleasantly surprised at how accurately they match the image. Can’t wait to get some yellow on them to see how they look.
Rather than sandbags and metal stairs, I opted for a wooden platform. Mostly this is to act as a counterweight to remove the risk of it falling, especially once I have a basket set up for it.
I plan to do a little basket, the width of the platform is planned specifically so that I can make the elevator basket large enough to fit two models comfortably, three if they’re small and I squeeze a bit.
4 Likes
Shame about the textured paint shrinking slightly, but they still look great from the pictures at least!
1 Like