Gaming Session 2 & 3

Got together twice this last week to play Fallout with @robhistory We had a blast.

First game: 600 Points of Super Mutants. 300 Points of Settlers, 300 Points of Brotherhood. I had set up the table with some pieces I’d dragged out of my terrain box for another game. We decided to just run with what was already set up. Rob made a bunch of barricades for the road that he put on the table, and we were good to go.

We set up half the Super Mutants at and near the Church and the other half over the bridge like they were coming back from patrol. The idea is that the church was part of a small settlement that was wiped out recently by Super Mutants. Our models, a couple of Brotherhood units and some settlers, were there to wipe out the Super Mutants and recover a stash of supplies left behind by the former settlers. The game was somewhat one sided. The Super Mutants being run as AI while we both coordinated our efforts against them. In hindsight, we talked about how to do the scenario differently. We did balanced units, but we think we should have given the Super Mutants about 25% more point value, then set it up so that the patrol models only appear after we’ve collected the stash. As it stood, we didn’t even get to do much searching, instead we were in a shooting match almost from the start and when the dust settled, we were all that was left.

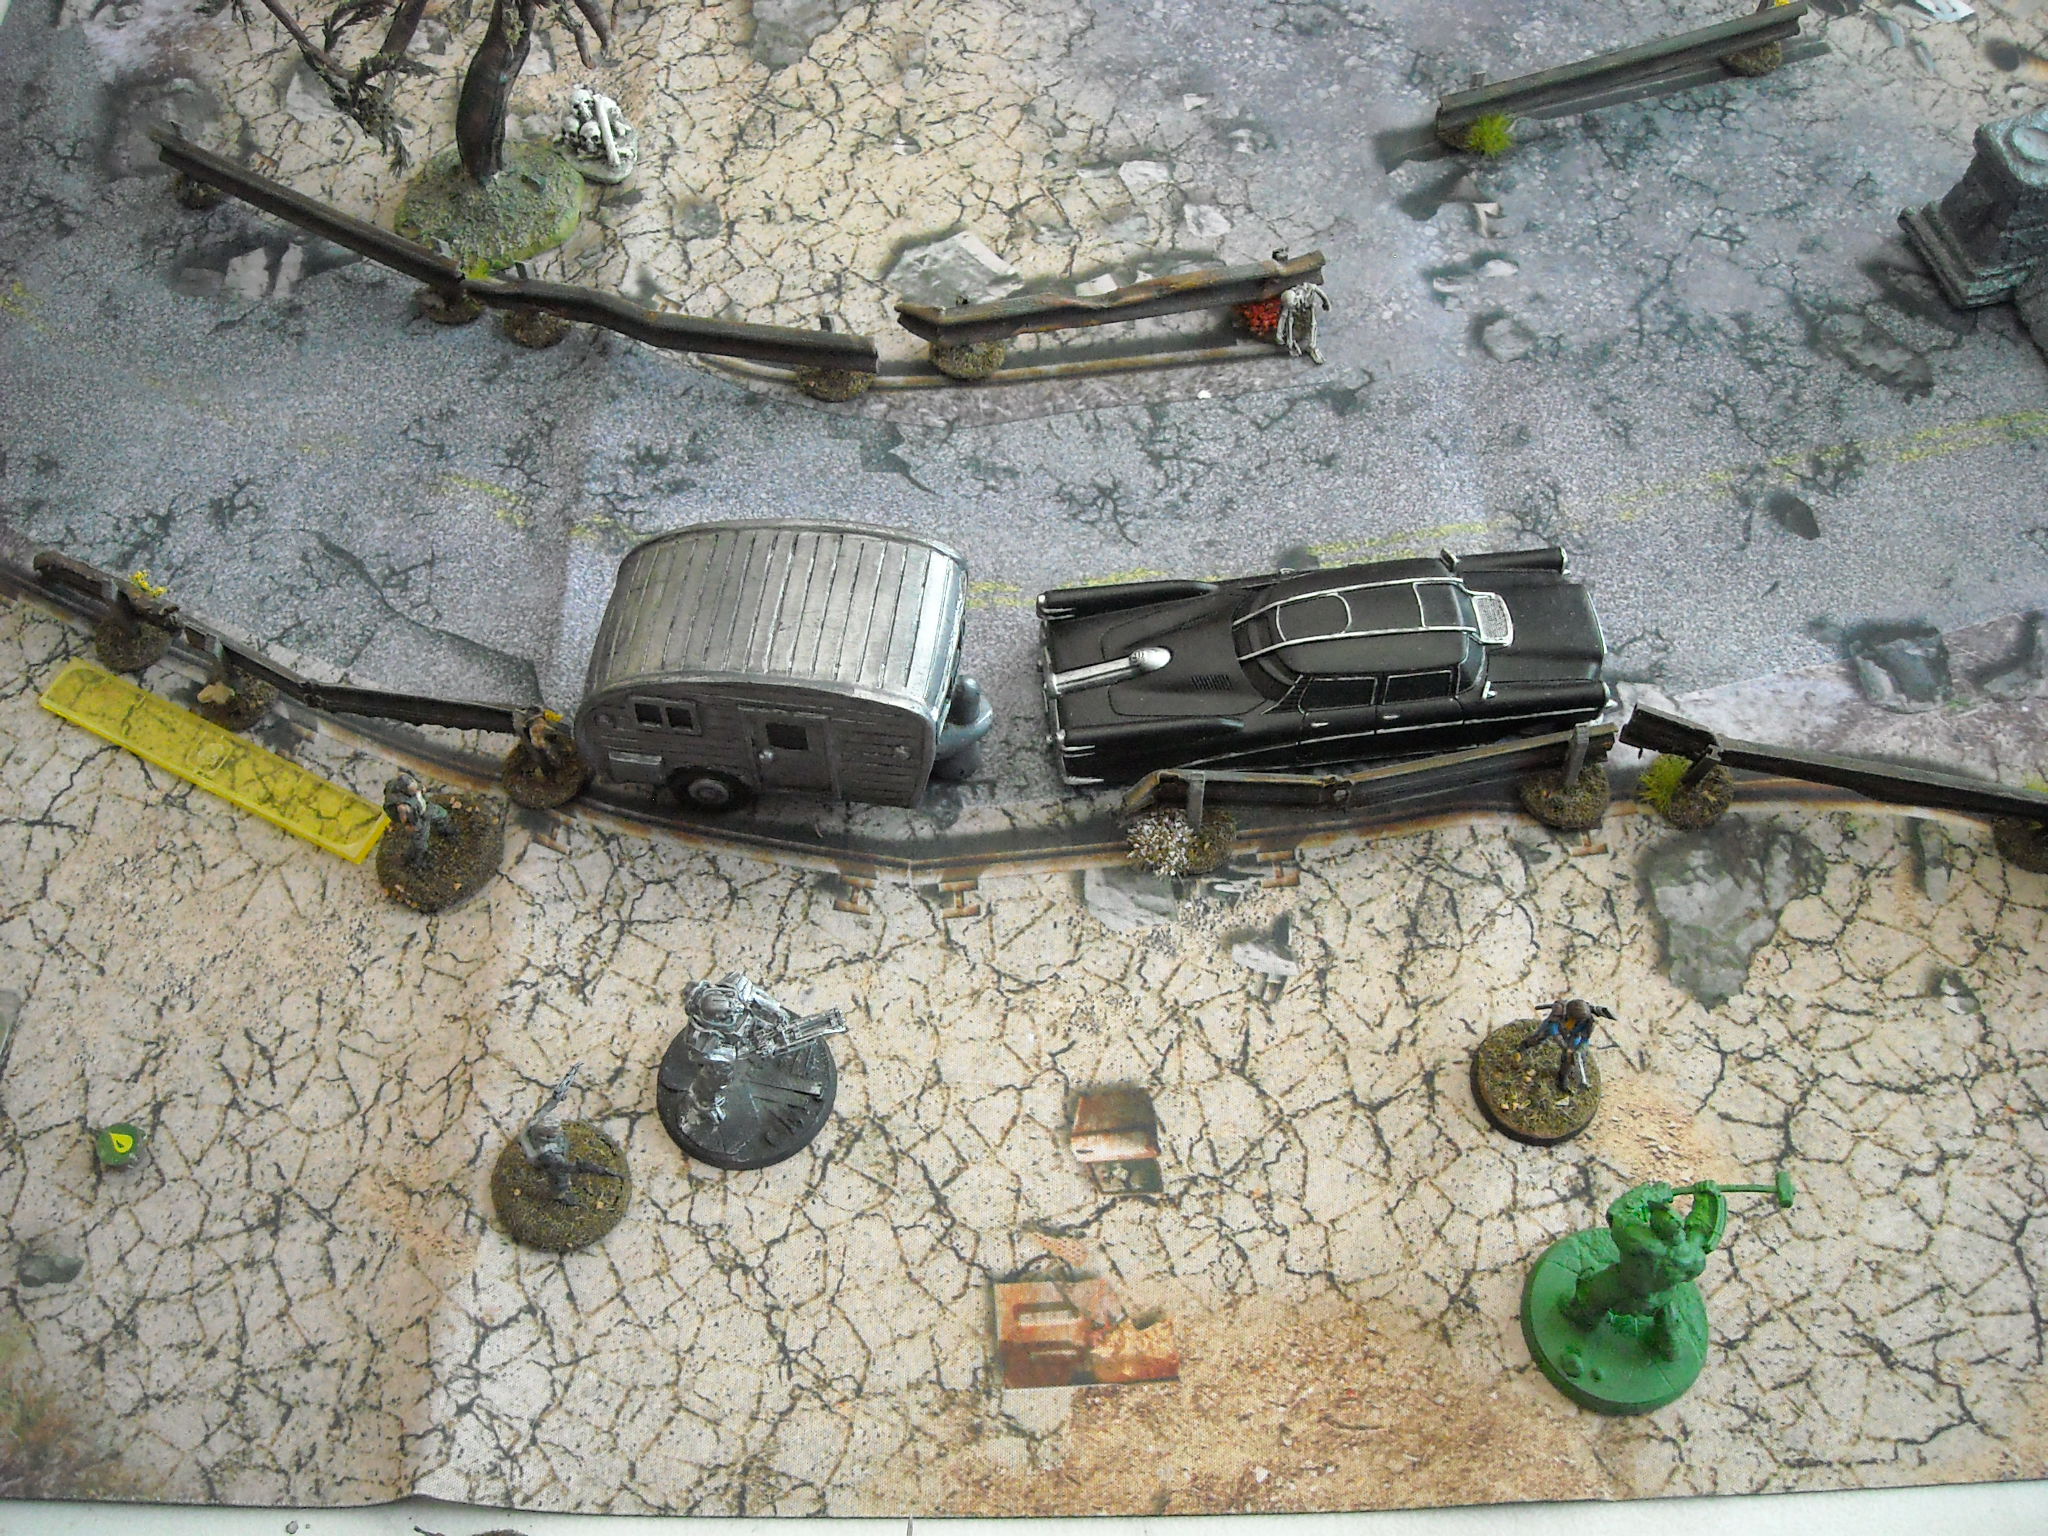
Now, this second game was probably the most fun one we’ve played. The idea was that we were a group of scavengers looking for supplies. Each vehicle/trailer was treated as it’s own search location for the sake of scavenging, and the search markers indicated additional places to look (Assuming those were junk piles or dead(?) ghouls to be searched.)

The game was brutal, we ended up finding 20 ghouls, and there was more than one time I was convinced we were going to get wiped out. When it was all said and done, we ended the game with only a single model on our side, and that model had only one point of life remaining, . . . . yes, it was that close.

Using the rules I have below, we were going from vehicle/trailer to the next, trying to be careful to trigger only one or two locations a turn so we wouldn’t be over run while scavenging. The camper trailers are those ones I mentioned a while back where I repainted them and tossed them on the table. Was really awesome getting to field that many of them at once.

This second game, we used a set of special rules I drew up for Feral Ghouls. It worked out really great. I’ll detail the rules at the end of this post.

The final setup we actually played twice. We built 500 point groups and faced off against each other. The idea was that the Brotherhood had a Knight go missing on patrol. The Knight was killed. A local settlement found the knight and decided to haul everything back to their settlement where they were trying to get the damaged armor open in the hopes of being able to use the armor themselves. The Brotherhood wanted their armor back, and the settlement didn’t want to give it back, so the Brotherhood came ready to take it back by force.

One of the first things we noticed was that the Turrets are VERY mixed as far as usefulness. Half of the Brotherhood models had better range than the turrets, so they just stood back and chewed them up. On the other hand, the couple of times they DID get to act, it was pretty awesome. If anyone wants to use turrets in their own game, I recommend setting them up in positions that people can only gain line of sight if they’re in the turret’s range. They’re worth EVERY point so long as they are well placed.

The game was pretty one sided. My Brotherhood force moving in and systematically wiping out the settlers. When the game was said and done, the only two models left standing were the two Knights in Power Armor.

Since we had plenty of time left, we decided to just swap forces and play the game again from the other perspective. The results were the same, only difference is that the two Knights took less damage the second game.

After talking about it for a while, we came to the conclusion that two things could have made the game a bit more even. The first: Better placement of the turrets, in both cases, we were able to hit those at distance with little risk to ourselves. The second: The Enslaved Techs can’t hit the broad side of a barn. With two of them on the settler side, we hardly hit anything during either game. We both felt that those points would have been MUCH better spent on something that had a better ranged combat skill.

Now, those rules I mentioned for Feral Ghouls:

The search markers, we allowed the players to search them normally. About half of them were blanks, but instead of having those be nothing like usual, we instead treated them as sleeping Ghouls. If you searched one, the ghoul was placed on the map in that spot and as soon as the character currently acting had finished their turn, the ghoul got to move immediately.

The small campers were treated as “Cars” for this game, and the semi trailer was rolled on the Trailer/Large chart.

All items on this chart was rolled on a d6.

Any model coming within Yellow of a location triggered a roll. The ghoul(s) was placed and the active model was allowed to finish it’s turn. The Ghoul went immediately after that before any other model was allowed to make it’s normal move.

Cars (And small structures.)
1-4 = 1 Feral Ghoul.
5 = 2 Feral Ghouls
0 = No Ghoul

Trailers (And structures larger than a car but smaller than a house.)
1-5 = Number of Feral Ghouls equal to the dice roll.
0 = No Feral Ghouls

House Exterior (And interior rooms.):
1-2 = 1 Feral Ghoul
3-4 = 2 Feral Ghouls
5 = 3 Feral Ghouls
0 = No Ghoul

Keeping in mind, we’ve only played using these rules the one time. 13 Car/Small search areas, 1 Trailer/Large search area, and 8 Search markers, half of which triggered a Feral Ghoul. On average, we should have seen around 20 Ferals, which is exactly what we managed to trigger. It was desperate, it was brutal, and after wave after wave of Ferals rushed us, we both thought the frantic rush of Ghouls felt a lot like the actual games. Because they didn’t all come at us at once, we were able to wipe out about 50% more points worth of Ghouls than the value of our own units.

Sorry I didn’t take more pictures, but I hope you all enjoyed the battle report all the same.

Until next time!

5 Likes

Awesome report!! I’m glad to see the rules for the ghouls worked out well for you!

1 Like

Yeah, I expected the Feral charts would work out pretty good but that they would need a little tweaking, but they actually felt really natural. My recommendation to anyone planning to use the above chart, average what the rolls would be and plan for 25-30% more ghouls in value compared to the size of your own force. Make that up to 50% if you want things to be truly desperate.

Hello, I have a totally unrelatd question: where do you got or how have you made the crash barriers for the road? Thanks!

1 Like

The crash guards for the road were made by @robhistory It’s my understanding that they’re a 3d print item that Rob printed, then painted/modded them as desired. When they showed them to me the other day, they were talking about how they were melting the ends on a few to create damage and how they planned to use some lighter colors if they ever decided to do another batch.

They really do look great, don’t they? I was really happy he brought them, they looked great on the table.

The mat is mine, as is the shipping containers, most of the automotive related stuff, TTCombat buildings, and BattleSystems stuff. Everything else on the table Rob brought (And in most cases built and/or painted themself.) Additionally, the unpainted and partially painted models were mine, while the completed models belonged to Rob as well.

If you’d like, I could ask them about it and see if I can’t learn more (And I tagged them in the message above, so maybe they will notice and drop in to add their two bits as well?)

2 Likes

Thanks! I also have the mat and some TTCombat buildings. Unfotunatelly I have no 3d printer, however I was thinking on making those barriers from old style antenna wire.

1 Like

If you try to make them from scratch, please sow us. would love to see how they turn out.

I talked briefly with Rob today. They said they ARE 3D prints and likely came from thingverse. Hope that helps.

Here are some I made using woodland scenic’s I beams along with the sticks from long fireplace matches (after use that is) and some 20mm square bases. The plasticard I beams are pretty pliable so you can shape it some. The ones I made are shaped to fit the rails on the playmat.

3 Likes

Very nice. Your barriers look really good.

For the match stick thing, if you’re planning to do much of that, look at your local craft store (Or even the craft section of Walmart or similar stores) and you’ll be able to find pieces of wood that are about the same size and a bit longer than your average match. Very useful stuff if you scratch build stuff.

I love the swingset. Is that a scratch build?

Also the two square terrain pieces, the bushes are intended to be multifruit? And what is the other one? Any chance you could get a closer image, they look like a couple of really nice terrain pieces, and I’d love to learn how you did them.

PS: Looks like this is your first post to the forum, welcome!

without trying to high jack the thread too much. The square pieces in the background are garden plots with mutifruit and tato’s. The swing set is scratch built from a wire clothes hanger and jewelers chain with plasticard seats. The tato’s are scratch wire with green stuff tato vines. and the plots are foam core base with match stick “rails”. The matchsticks are recycled from use. Long stick matches for barbique/fireplace, so its a 2 fer. And the teeter totter is plasticard and left over wire hanger on a 40mm base staples were used to make the handles.

When I started playing war games there were no terrain companies and the nearest store was 2 hours away so I and my play group learned to build all of our own terrain from whatever we could find over the years. The stuff being made for sale now is amazing and with 3d printers is much easier in some ways.

And yeah, my first post though I’ve been lurking for a while, Thanks for the compliment.

1 Like

No worries about highjacking. I figured I asked, so you’re welcome to hijack all you want. :stuck_out_tongue:

Really, you’ve got some great looking stuff there. I’d love to see more if you ever feel inclined to share. :wink:

1 Like

Welcome to the board!! And I agree, your stuff looks great!

The garden stuff is really nice, tho I did think the one was a set of those playground toys that are on springs…whatever their actual name is…which would have been an equally cool piece!

I look forward to seeing more of your work, as I will likely be buying or scratch building most of my own stuff. I have a friend with a 3D printer, but it’s like herding cats to get them to print something for you. Lol

1 Like

@AlxRaven Funny you mention the rocket spring things. I’ve been thinking about how to replicate those for a while as they are great pieces. And since investing in a soldering iron I’ve got designs on a few sets of “monkey bars”. And Thank you as well for the kind words.

1 Like

Also @GateKeeper I love your re-purposing of the campers. I’ve been looking for some campers too. There is a set done in 1/43rd but they were a special release thing and are super spendy if you can find them. Good to see the aquarium ones “clean up” well with some repaint.

I’d love to see one of the Lazer MDF folks do a camper… Some of the companies are getting very creative with curves and bends as well as pre painting, which after 30 years of making and painting mini’s and terrain I will gladly let someone else paint my terrain now lol…

@AlxRaven about the 3d printer I totally know that one too, I’ve got a buddy who’s had one for 2 years and we’ve yet to see any printed terrain lol. Though the printers can be finicky unless you get a high end one and well that costs. The new gel medium printers are very exciting.

1 Like

Have you considered using the spring from one of those pens with the retractable tips? The size might work.

The campers were from Dollar General and cost me just a dollar each. These are actually intended as garden decorations, but they were really easy to work with

Thanks, I will check it out, but also try it from scratch. Might be cheaper. :slight_smile:

1 Like

Literally just bought three of those campers from Dollar General like 2 minutes ago, btw. Great find, Gatekeeper!

1 Like

Awesome! Glad you were able to find some. Did you get one of each? (There were three versions of the camper around where I live.) Not sure what you’re thinking for the painting, but all I did for mine was a grey primer, painted the whole thing gunmetal gray (Cheap paints from Walmart, Folkart brand. Only one coat without worrying about complete coverage, that way some spots look less shiny than others.), painted the windows and tires black again then hit the whole thing with a black wash. They look good like that, but if you put a little love into the painting, you could really make them look fantastic. Will be looking forward to seeing how yours turn out.

Also, I don’t know if it’s going to make any difference to you or not, but out of curiosity, I drilled a little hole in the bottom of one of mine just to find out for sure if they were hollow. They ARE hollow, so it would be possible to cut out the bottom if you wanted to somehow do an interior for the piece. I’m nowhere near ambitious enough to put that effort into it though.

Its less about the spring and more about the lack of model rocket to turn into a riding toy.