Gaming with guy (battle reports)

Hello all, I’m starting a new thread for posting my battle reports from the games I play. I’m gonna try to play an AI game at least once a month, and hopefully it’ll be a lot easier to keep things interesting with the new terrain I’ve gotten.

(all of my big terrain bits are from Black Site Studios, for any future inquiries)

4 Likes

My first (reported) game is a homemade scenario, in which a small trading outpost has been taken over by a band of veteran raiders, and it’s citizens have been taken hostage! The local militia is pressed for forces it can spare, so they have hired a trio of mercenary protagonists to assist in liberating the town.

This trio of protagonists have been joined by a veteran ranger, a militia officer, lone surviving militiaman of the trading post’s original guard.

Unbeknownst to them, the raiders they are pitted against are no ordinary bandits. They are, in fact, grizzled veterans formerly belonging to a great raider horde which once pillaged the land many years ago. In their cunning, they have reprogrammed two protectrons formerly owned by one of the shopkeeps to help defend their hold on the town, and they have some heavier armor in store.

The hostage townsfolk are being held within the largest building, the general store. The heroes’ objective is to free the hostages at all costs, with securing the town coming second.

The sound of Vertibird rotors can be heard in the distance. This won’t be a two-way battle for long.

These are the cards I’m using. I’m following a very loose interpretation of the rules since my tiny peabrain can barely remember to factor in the -2 skill penalty for firing at targets in cover

3 Likes

Round 1 begins with the protagonists moving into positions. The militia officer and the militiaman take up position in front of the smaller buildings to provide covering fire for the Shi warrior to cross the street and move in for close combat. The ranger, the sharpshooter, and the armored lad move up towards the general store.

Round 2 sees the Shi warrior reach the other side of the street undetected, while the raider sniper remains on guard. The second group continues their approach.

Round 3 is when the shooting begins. The militia duo score some minor hits on the raider watchmen, while the armored lad and the sharpshooter prepare to make their entry into the general store.

In round 4, the armored lad makes his entry into the building, scoring a whopping 4-damage hit on the raider leader (which I forgot to take a picture of lol), while the sharpshooter tries to score some hits on the powerarmored raider on the roof. The Shi warrior engages a raider watchmen at close range, and takes heavy damage in the process. The militia officer receives heavy returning fire, and is forced to use her stimpak. Meanwhile, the protectrons are deployed and begin their slow but steady approach.

Round 5 has the armored lad continue his barrage on the general store, while the ranger scores some hits on one of the raider watchmen down the street. The raider leader, having taken much damage, flees the building to recuperate. The Shi warrior is forced to fall back after both raider watchmen turn their attention to her, and encounters the raiders’ heavy armor: a light APC. The militia duo continue to take fire from the enemy, while the protectrons continue their approach.

Round 6 sees the sharpshooter and the armored lad make their push into the general store, where the raider leader has returned to join his comrade. The militia duo make a decision to pull out and regroup with the ranger. The Shi warrior scores some hits on the APC with her submachine gun, then ducks behind a vendor booth to evade the incoming robots. The raider watchmen turn their attention towards the ranger.

Round 7 sees the first two casualties of the game, as one of the raider guards in the general store is blown away by combat shotgun and hunting rifle fire. The raider leader once again flees the building as the APC passes by. The powerarmored raider on the rooftop drowns the militiaman with minigun fire, as the ranger heals the militia officer and proceeds to score a charged hit on one of the protectrons.

Round 7 is as far as I’ve gotten in the game as of writing this, as I needed to take a break because my sore leg was starting to get unbearable to stand on. I shall finish the game after eating lunch, and write the rest of the report when that has concluded.

6 Likes

Really like the purple protectron you posted in the first image.

And it’s nice to see that I’m not the only one making use of the old Army Man barbed wire fences. :wink:

1 Like

Okay I might have gotten too tired to finish the game last night, but it’s over with now.

Round 8: The protectrons lurch their way up the street, while the ranger makes his way behind the general store to avoid them. The raider leader comes back to attempt another attack on the group in the general store.

Round 9: The raider leader is blown away by hunting rifle and combat shotgun fire. The militia officer narrowly dodges APC fire, while two of the raider veterans make their way towards the general store. The powerarmored raider descends from the roof to back them up.

The vertibird noises cease, and a squad of BoS forces show up on the edge of town, their motives unknown.

Round 10: The militia captain ducks for cover from the incoming protectrons behind the hood of the wrecked truck, while the APC fires another volley at her, but misses. The powerarmored raider closes in, while the group inside the general store works to free the captured townsfolk.

The BoS and the townsfolk join the fray with the following builds:

Round 11: The townsfolk are freed, and as soon as they are, the mercenaries spring out to kill the powerarmored raider. Meanwhile, one of the raider watchmen tries to use the nuka-cola machine, as the BoS paladin wearing T-51 moves in to dispatch a “potential hostile”.

Round 12: As the number of surviving raiders grows thin, the raider sniper begins her attempt to flee from the battlefield. The militia officer is melee’d to death by the BoS paladin, as the rest of the protectrons are destroyed. The townsfolk and the mercenaries prepare to take on the APC.

Round 13: The APC swings by taking heavy damage from the townsfolk, while the BoS forces get into position to take it on themselves. One of the townsfolk is killed by machinegun fire from the APC, as the raider sniper lands a few hits on the T-51 paladin. The raider watchman passes an agility test to hop on into the APC, as the T-51 paladin passes a strength test to move the wrecked truck aside.

Round 14: The APC’s escape is cut short as it is destroyed by the armored lad’s rocket launcher, killing both it’s crew and the raider watchman inside. The raider sniper desperately tries to flee, but is lit on fire by a distant laser bolt, before disappearing off into the distance.

Though most of the militia forces that went in to aid them perished, the mission is a success, and the mercenaries are paid their dues in full. Though they denied it, it seems the BoS squadron was there to poach control of the town right out from under the townsfolk. They get the feeling that had any more of them been killed, the BoS squadron would have likely tried to kill off the remainder themselves. What the BoS wants with this small trading post remains a mystery.

That was a fun game, but it certainly did take it’s share of time to run. It’s really nice to be able to play on an outdoors table instead of just another vault configuration. I wouldn’t recommend picking up FoWW with only vault terrain to run it in, the scenarios you can play are limited. Hopefully I’ll get some more fun miniatures painted up for the next game I run, and hopefully I can think up a less time-consuming scenario!

6 Likes

Okay, since school started back up last month, I haven’t really had the energy to sit down and write up the report for the game I ran last month. But, since I’ve just finished setting up a game to run tonight, I figure I might as well just sit down and write it out before I stop caring enough to go back and write it.

Scenario synopsis:

“There’s a scrapyard on the edge of town run by a rival gang that’s been taken over by Super Mutant squatters. Word on the street is, before they were taken out, they came across a couple high-quality aircraft parts. Now, I’ve got a client who’s in the market for parts like these. If you can get me those parts, without taking out any of those Muties, you’ll be paid a cut of the profits.”

Because I like to try to keep things more varied than standard attacker/defender shootout game, and because I wanted something that would go by a bit quicker than matches with lots of models tend to, I decided to try running a stealth-based match, where the objective is for a small force to enter a heavily guarded area and retrieve several searchable objectives. I’d also put together a big junkyard table with some new terrain pieces I’d put together, and this scenario just kinda took off from there.

There are supermutant guards all throughout the camp, and eight searchable tokens representing either A) lesser airplane parts, numbered 1-3, which yield a 15 cap bonus to the mercenaries’ final pay, B) misc. item cards, or C) nothing.

The main airplane part objective is an engine block, represented by this black and white gizmo (which is actually the pull-back motor from one of my toy cars that I cut out):

The engine block is unfortunately too heavy to pick up and carry like a normal item, so whoever grabs it must drag it along the ground, with a movement speed reduction of one color. The model attempting to drag it must also spend a turn to grab a solid hold of the engine block.

Because the scrapyard is owned by a rival gang, the employers want the mercenaries to minimize supermutant casualties, as to make it harder for the rival gang to retake their scrapyard. Because of this, there will be a -10 cap deduction from the final payout for each supermutant model removed from play. Stealth is optimal for this mission.

The mercenaries come equipped with a stealth boy and three “timed” frag mines. The idea here is that the mines will explode after one turn, and can be used to cause a diversion to distract the supermutants. The supermutants are equipped with typical supermutant gear.

Since I normally don’t use the ready tokens like you’re generally supposed to, I’m using them in this scenario as “aggro tokens”. Kind of like the [Hidden]/[Caution]/[Danger] system from the 3D fallout games, grey-side-up tokens represents that the model is not suspect to the presence of any enemy models. Enemy models must test stealth against their perception skill to avoid making the model “suspicious”, or blue-side-up on the ready token. A “suspicious” model will move to investigate the enemy model’s last known position, or will at least focus their attention in that direction. If an enemy model fails another stealth check against the defending model, the enemy model will then be “spotted”, and will enter combat against the defending model. At this point the ready token is removed and the models enter combat like a normal game of FoWW.

4 Likes

The mercenaries (the Sharpshooter and the Shi Warrior) start off in a ruined building across the street, while the supermutants are spread out throughout the camp. Two supermutants and a Brute sit around a campfire, while a supermutant Master watches over the driveway of the scrapyard with the two mutant hounds. The supermutant Aviator stands guard in the lookout tower.

(note: the range rulers on the board represent the defending models’ awareness ranges)

Round 1: The Shi Warrior runs over to the intact building to the south, while the Sharpshooter moves up the street to the north, just barely out of the mutant hound Fiend’s awareness range.

Round 2: The Shi Warrior stays put for a turn while the Sharpshooter places a mine and runs back to cover.

Round 3: The first mine goes off and alerts the two hounds, while the Sharpshooter runs over to the southern building. The Shi Warrior dashes across the street to underneath the guard tower, where she is able to detect two of the searchable markers. During the supermutant’s turn, the hounds move over to investigate the site of the mine explosion, and the Master looks over and tries to see what’s going on.

Round 4: The Shi Warrior dodges the Aviator’s perception checks, scoops up part #2, and runs deeper into the camp to discover part #3’s location. The Sharpshooter moves towards the guard tower, intending to follow the Shi Warrior’s route, but fails their stealth check against the Aviator, arousing his suspicion. The hounds continue their search, but are unable to detect anything.

Round 5: The hounds return back to their Master empty-handed, while unbeknownst to them the Shi Warrior has already collected part #3, and remains undetected. The Sharpshooter is forced to activate their stealth boy to avoid detection.

Round 6: Unsatisfied, the Master orders his hounds to patrol the scrapyard, while the Shi Warrior moves up against a shipping container to plan her escape. The Sharpshooter easily evades the Aviator with the help of their stealth boy, and comes within range of the prized airplane engine block.

Round 7: Evidently unaware of how fast mutant hounds move, as the Sharpshooter prepares to lift the engine block, they suddenly find themselves face to face with the gruesome, slavering jaws of the mutant hound Fiend. No longer suspicious, the Aviator returns to his watch, while the other mutant hound passes by beneath. Having seen the Fiend pass her by, the Shi Warrior realizes her friend is probably in danger, and prepares a mine right between the shipping containers.

Round 8: The Sharpshooter fires off two shots against the Fiend, but misses both. They are repaid for their kindness with a devastating three-damage hound bite. Meanwhile, the Shi Warrior’s mine detonates, drawing the attention of the entire rest of the supermutant squatters. The Warrior is able to escape undetected.

Round 9: The Shi Warrior drops off the two lesser aircraft parts near the exit point, and devises a plan to rescue her friend. Meanwhile, the rest of the mutants convene near the site of the explosion to figure out what caused it. The Aviator is even spurred to come down and check out what’s going on. The Sharpshooter manages to dispatch the Fiend with a few well-placed shots, and is able to proceed with trying to get the engine block out of there.

Round 10: The Shi Warrior makes her way back over to the guard tower, only to notice the supermutants have split up to search the scrapyard. The Sharpshooter spends a turn to grab ahold of the engine block to move it, as the other mutant hound closes in.

Round 11: Feeling brave, the Shi Warrior throws the last mine at the nearest supermutant, alerting the rest of the muties to her presence and initiating combat. The Brute, however, is not alerted, and continues his search, as the Sharpshooter tries desperately to drag the engine block away.

Round 12: The mine explodes and damages the Aviator as the Shi Warrior tries to outrun the mob of angry mutants, but to no avail. The Shi Warrior is chased down and knocked out with two swift whacks of the sledgehammer. Thankfully, the Sharpshooter is able to pull the engine block over to the base of the guard tower, and passes a stealth check against the unsuspecting Brute.

Round 13: Somehow, the Sharpshooter is able to get the engine block through the base of the guard tower, and reaches the street safely. The not-quite-dead Shi Warrior is hauled off to the mutant’s camp to be locked up as prisoner and eaten at a later date. Satisfied they have found the culprit of all this commotion, the mutants return to their posts.

Conclusion: The Shi Warrior is locked inside one of the empty scrapyard sheds, soon to become tomorrow’s dinner.

Realizing what happened to their friend, the mercenary team begs their employer for assistance in rescuing their comrade. Reluctantly, and with the agreement that they forfeit any of their payment for this job, they agree to lend a hand in a full frontal assault in the morning.

Satisfied with a job well done, the supermutant squatters celebrate around the campfire and sing their mutant songs, as jolly mutants tend to do. They realize, however, this scrapyard won’t remain safe for long, and the humans will likely return in greater force. They agree to abandon the camp by tomorrow.

I was going to run a follow-up game where the mercenaries and their employers stage a rescue mission to rescue the Shi Warrior, but I didn’t feel like running another game on the same map, so we’ll just pretend like the mission was a success and the mercenary crew is able to move on to the next job, with the only loss being their hard-earned pay for stealing the engine block.

6 Likes

The Clark Kent effect works. I was wondering where that figure with the moustache and glasses was sold until I realized it was the Mysterious Stranger wearing darker clothes than normal! Grate Jorb! :slight_smile:

1 Like

This has inspired me to teach myself how AI works. I’m going to set up The Undiscovered Vault on my game table and paint what terrain isn’t painted for the scenario and add details and basing since it’s raining today and I have nothing to do. We’ll see what I can finish today and play tomorrow.

1 Like

If there’s a company that makes 1:48 or 1:50 or O scale plastic model cars, you could leave the hood open or off and leave the engine out and build it as a separate piece.

1 Like

Since October is already over, it’s time for me to write up another battle report for the game I ran a little over a week ago!

I really struggled to come up with a good map and scenario combination this time around. I wanted a scenario I could introduce a new character to my main mercenary group with, and I wanted to do it on a rather sparse map that made good use of the Black Site Studios shipping crate pieces. The first map I came up with was a small tent camp that had this really big wall protecting it. I wasn’t really feeling it though, and I then wound up evolving it into the tent camp area of a larger town map, which then got cut entirely and was replaced by a bazaar with the addition of these new scrap walls that I built.

This was all very fun to put together, but it didn’t really fit with what I originally had in mind for what my next FoWW game was gonna be. I wound up really liking how I set the buildings and the farm plot up in the final version of the town board, however, and I figured I could probably work something out if I tore the wall and the misc. tents down.

The end result was this.

Scenario Synopsis:

With no caps to spare after their previous mishap, the team wanders aimlessly for days between the meager outland settlements looking for work. Finally, they hear a distress beacon over the radio: someone with an oddly tinny female voice is being pursued by a band of Rust Devils, and is hiding in an abandoned farm depot nearby. They rush to the scene, but the Rust Devils are already there…

There are 8 searchable tokens spread throughout the depot where the person in distress could be hiding. Two item tokens are also included along the mix, and the rest of the tokens are nothing. the 5 token in front of the yellow building is there to represent a strength test to open the garage door in order to see what’s inside, and the shipping container nearest to the road is locked and requires a lockpick test to open it.

There are also two Glowing Ones milling about in the center of the depot.

The Rust Devils’ objective is to find and eliminate the person in distress, while the mercenaries’ objective is to rescue them. The Rust Devils may have the advantage of numbers, but they are cowardly, and will call off the operation and retreat if their robots are destroyed.

The Rust Devils feature Avery in Raider Power Armor, a single Scavver, and an Enslaved Tech with medical items to dish out. They are supported by a Protectron, an Eyebot, and two Battered Assaultrons.

The mercenaries are back at full strength, featuring the Sharpshooter (Scavver Outlaw card), the Commando (BoS Knight card), the Shi Warrior (Psycho Outlaw card), and the Ranger (Preston Garvey card). I’ll note here that part of the Ranger’s background is that he’s a medic, and I tried to implement some incapacitation/revive rules into this match so he could revive his downed teammates. The rules wound up being really half-baked and ill-thought-out, plus it kinda skewed things too far in the mercenary team’s favor. I’ll explain it when I get to it in the actual battle report though.

2 Likes

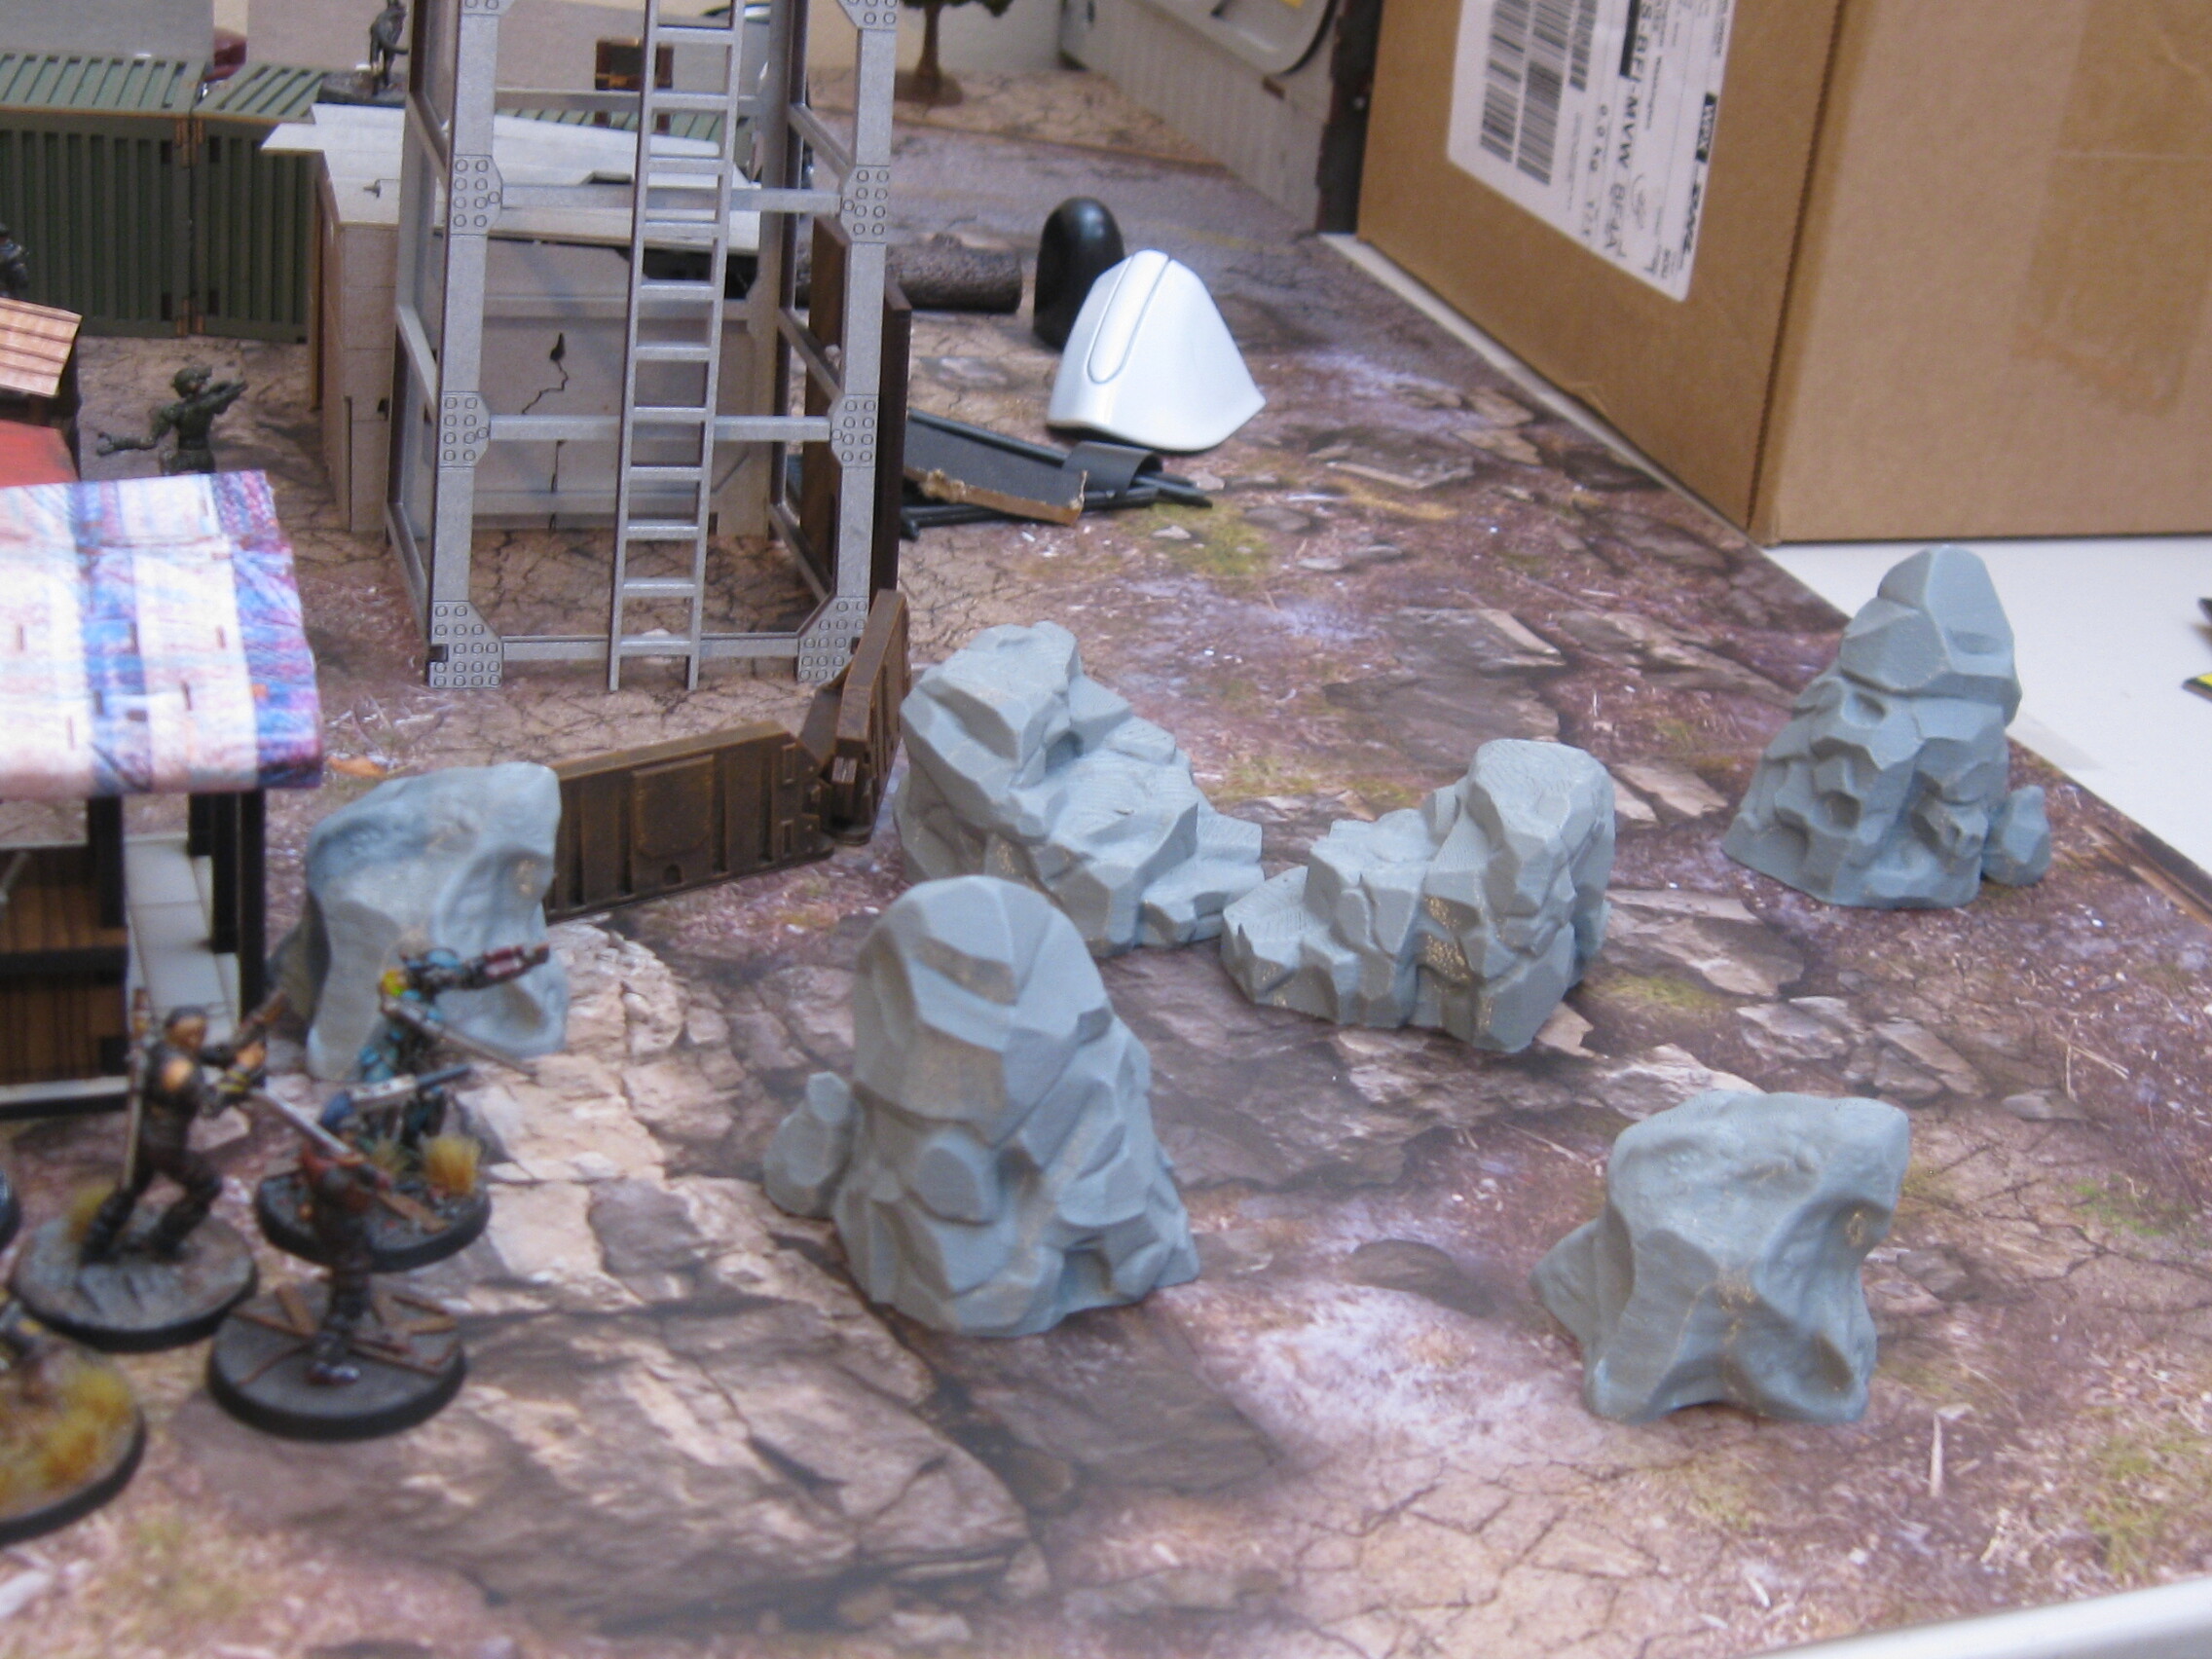
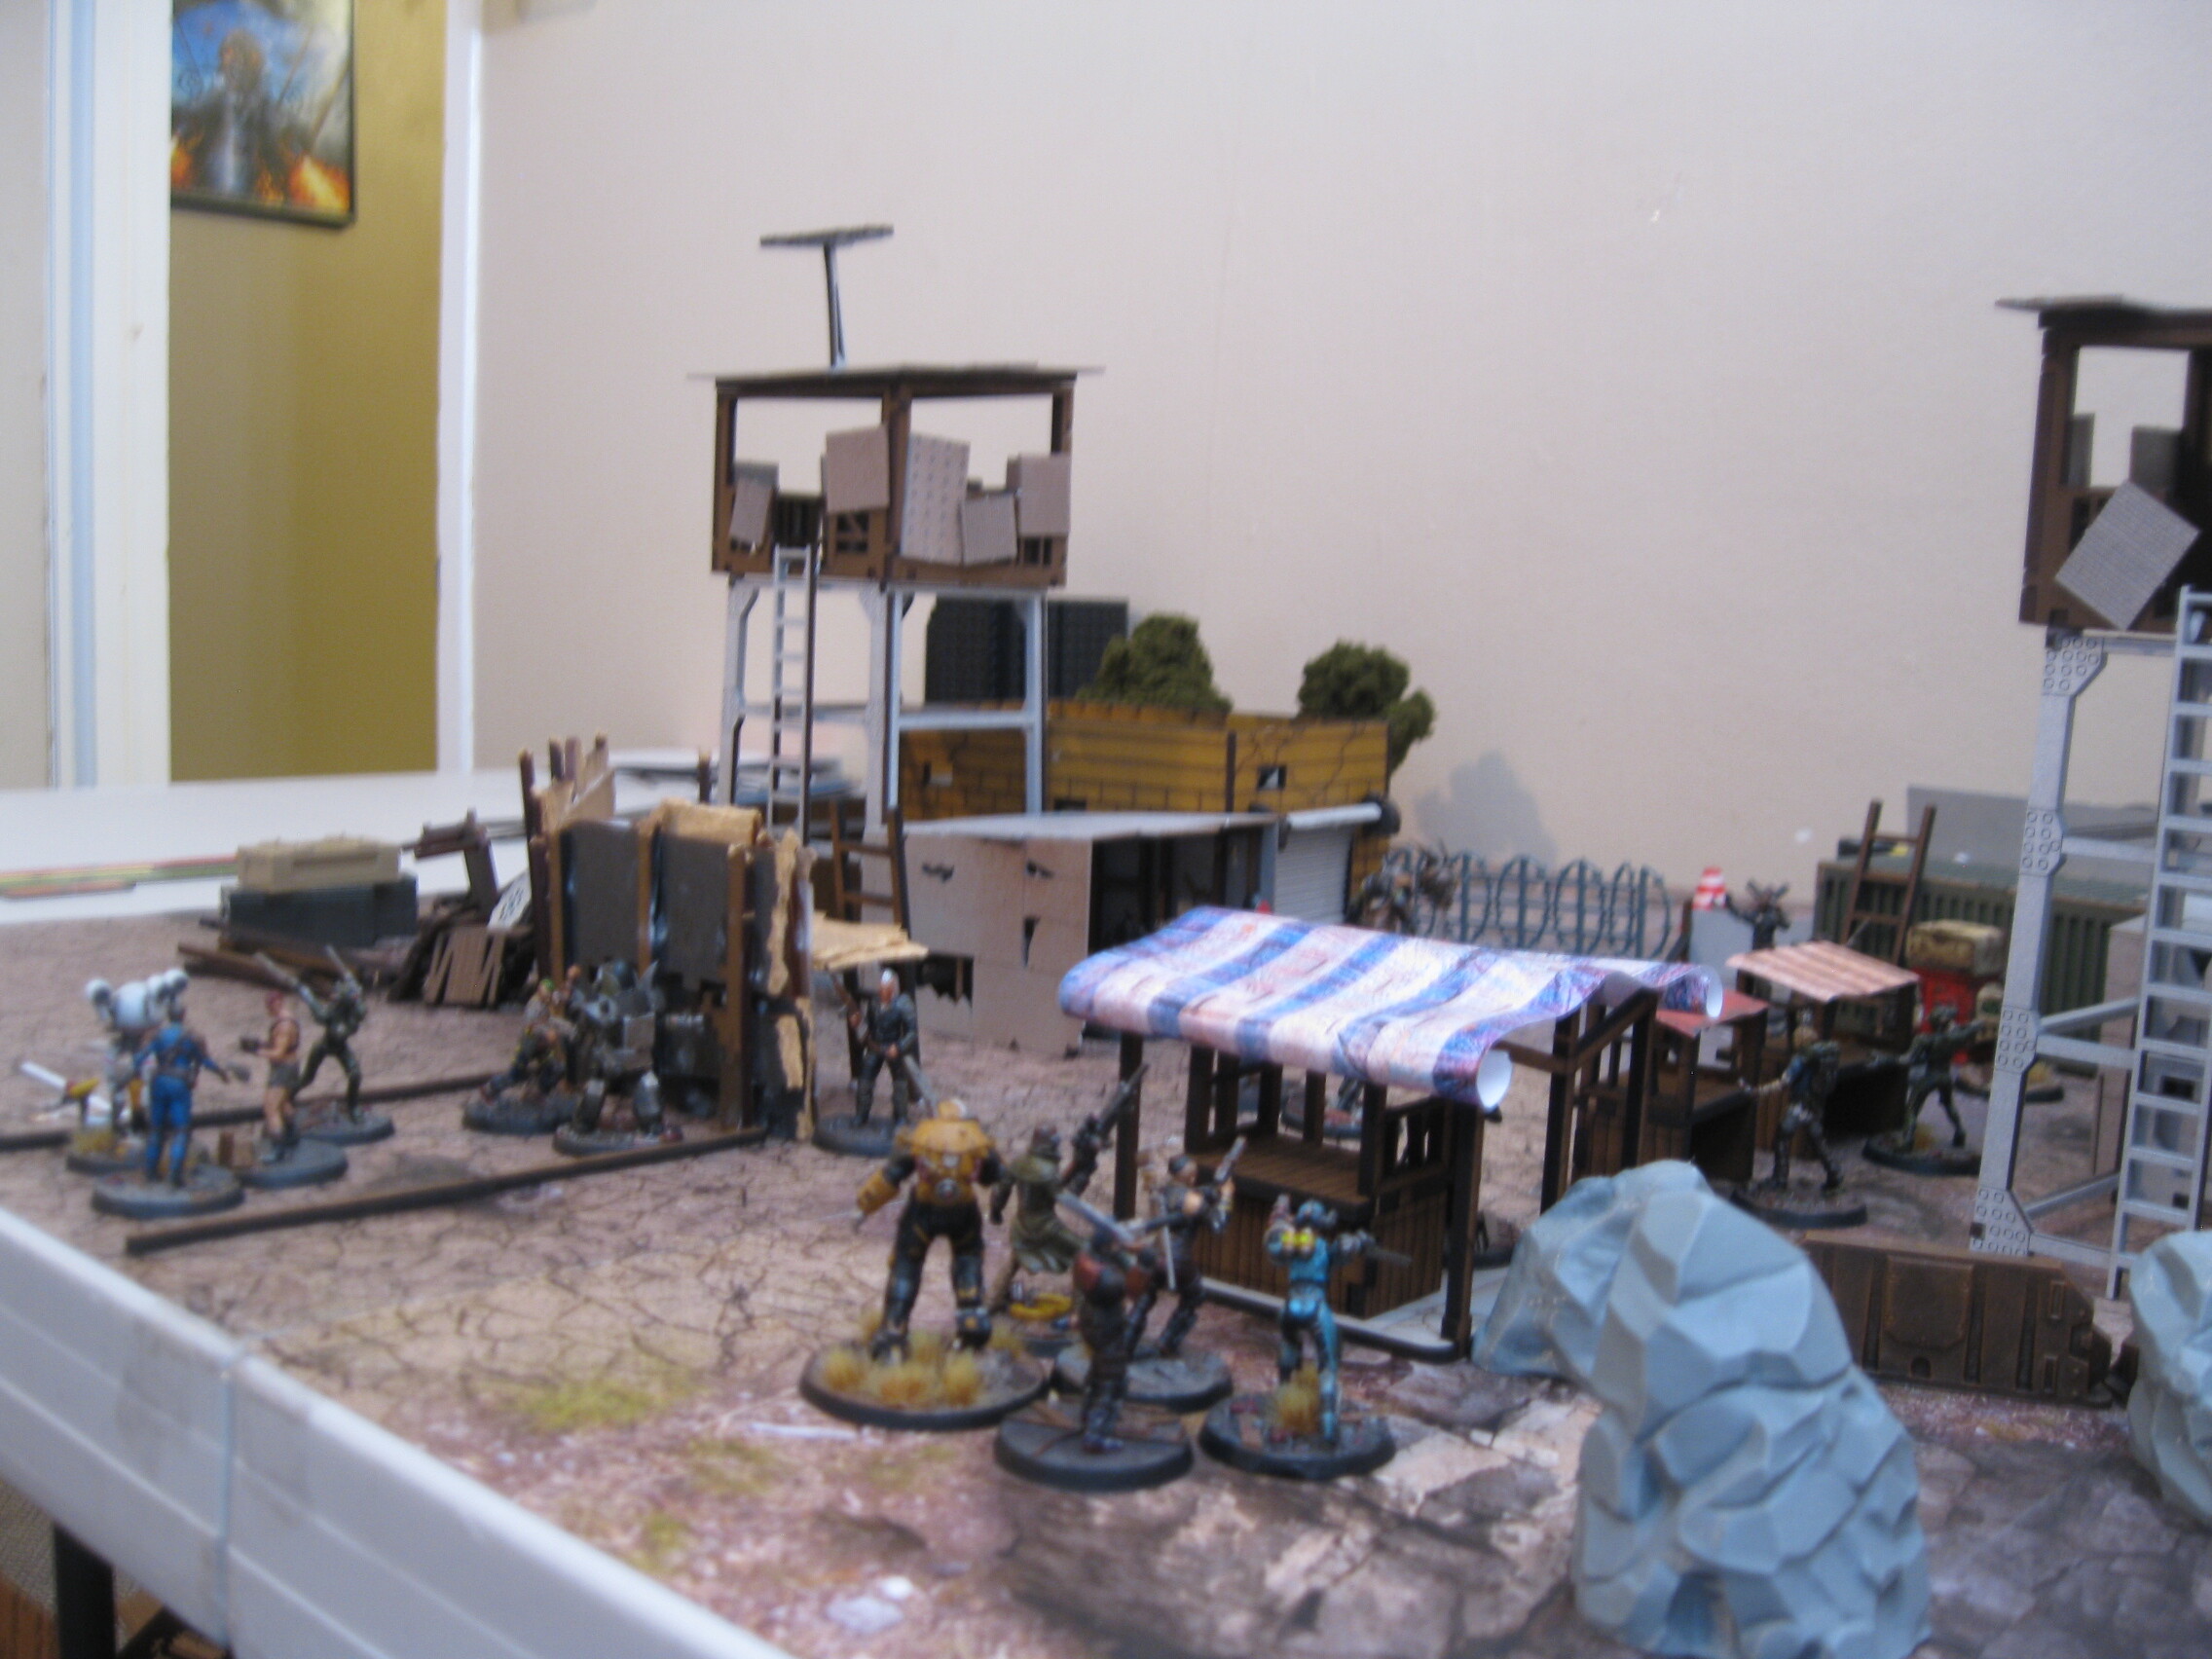
The mercenaries start off at the west end of the street, while the Rust Devils start off on the east. The Rust Devils arrived before the mercenaries did, and thus have the initiative and go first. Also, I’m drawing event cards every turn this game, to try and mix things up.

Round 1: The Assaultrons are ordered to rush forward and engage the enemy, while the bulk of the Rust Devil squad moves out to search the depot. The Sharpshooter and the Commando hold position to engage the Assaultrons, while the Ranger and the Shi Warrior move to search as well. The ghouls mill about aimlessly.


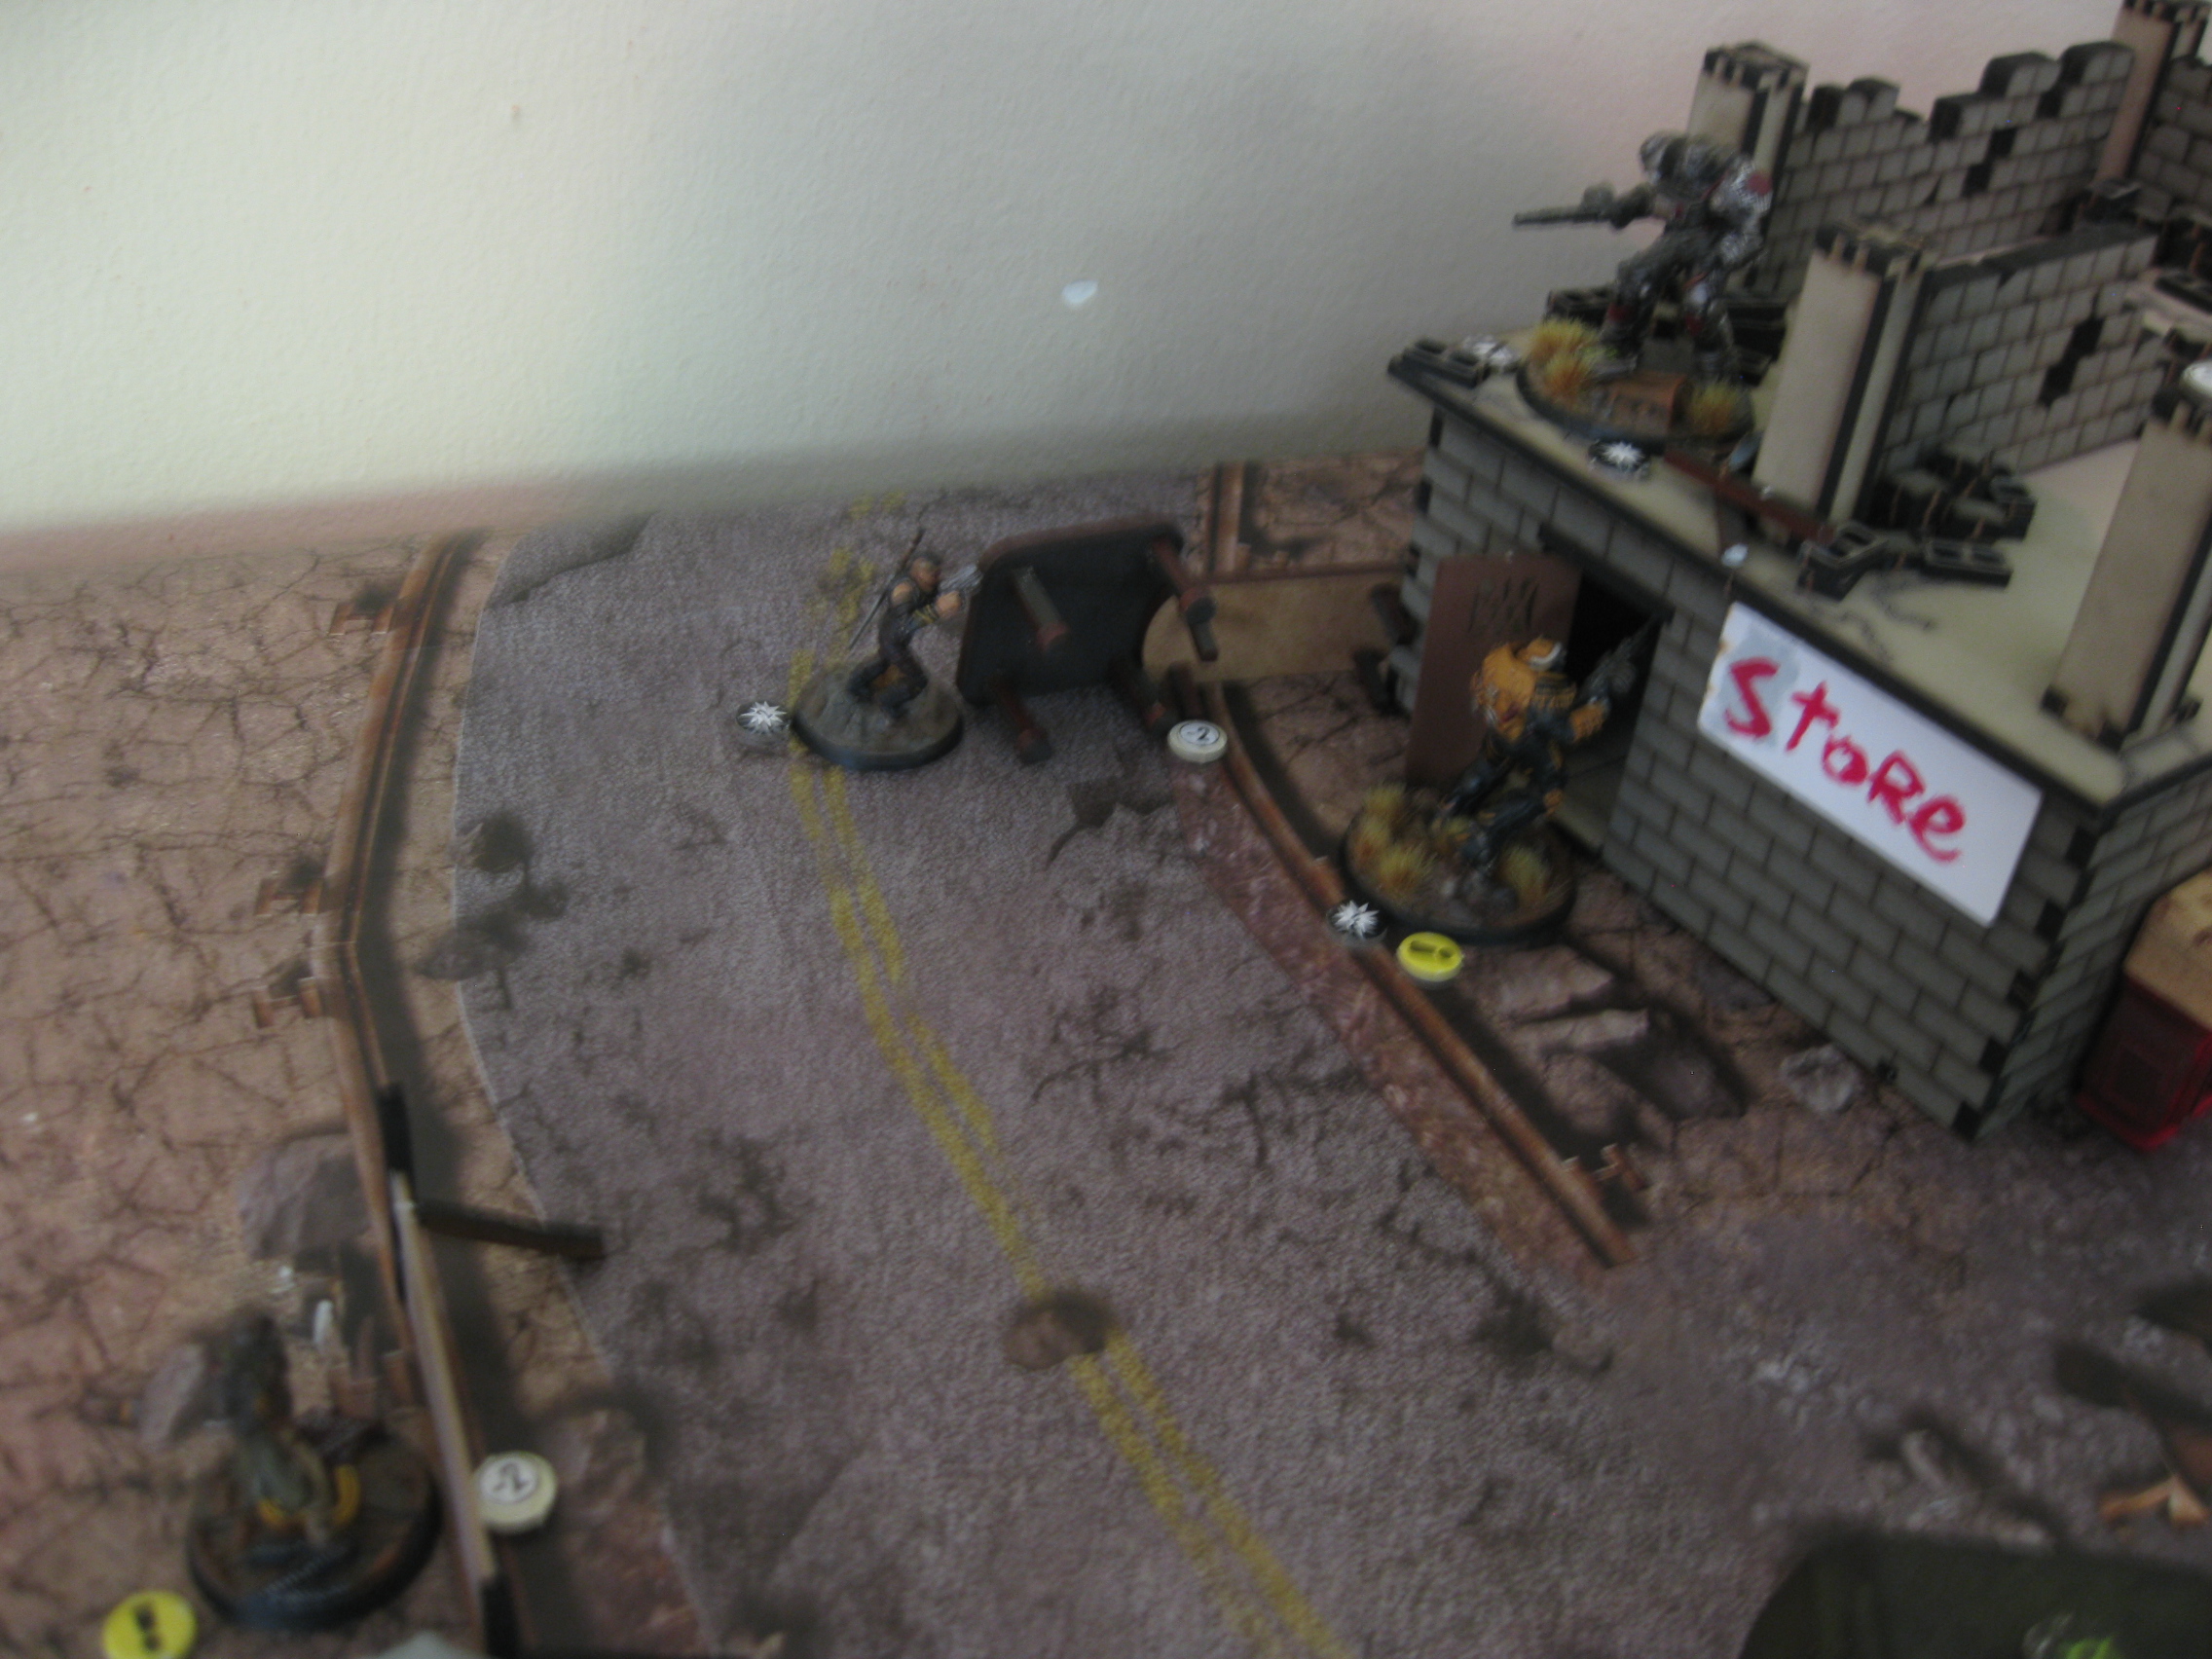
Round 2: The Shi Warrior checks the far shipping container to find nothing, while the eyebot advances and spots a high concentration of nothing underneath a lean-to. The bloated glowing one engages the Ranger at point-blank range, while the Assaultrons both charge on the Commando. The enslaved tech and the scavver both check the roof and find an item, while the power armored raider passes a strength test to lift the garage door and finds nothing. The putrid glowing one continues to wander around.

Round 3: This round’s event card had me draw a danger card, which had me test endurance against a random model on the team without the advantage. Unfortunately, that happened to be the Shi Warrior, so I guess there was a lot of stinky radiation air in that empty container she just opened.

The scavver finds an unusable artillery signal flare in the item marker on the roof, while the rest of the Rust Devils advance further into the depot. The putrid glowing one engages the eyebot, while the Ranger runs towards backup away from the bloated glowing one. The Sharpshooter and the Commando manage to take out one of the assaultrons, but the scavver on the roof takes aim with his combat rifle for next turn.

Round 4: The enslaved tech finds nothing in the metal shack, while his team (including the scavver on the roof) all target the putrid glowing one, as it has just destroyed their eyebot. Meanwhile, the Commando’s X-01 power armor breaks, as he and the Sharpshooter continue to grapple with the remaining assaultron. The Shi Warrior is downed by the bloated glowing one.

According to the rules I set up (which aren’t very good), the Ranger has three turns to revive the downed model before they must be removed from play. The Ranger must sacrifice a full turn to provide sufficient medical attention to the downed model. In hindsight I should’ve probably thrown an intelligence test in to perform the operation instead of spending a full turn, but oh well.

Round 5: The Rust Devils close in and continue to lay down fire on the putrid glowing one, as the Ranger struggles against the bloated glowing one. The Commando and the Sharpshooter score some solid hits against the last assaultron, as the enslaved tech moves up to the other shipping crate to test lockpicking.

Round 6: The Commando limps away after destroying the final assaultron with only 1 health remaining, while the Ranger slides over to revive the Shi Warrior. Meanwhile, the Rust Devils finally finish off the putrid glowing one, as the enslaved tech passes his lockpick check to search the final shipping container.

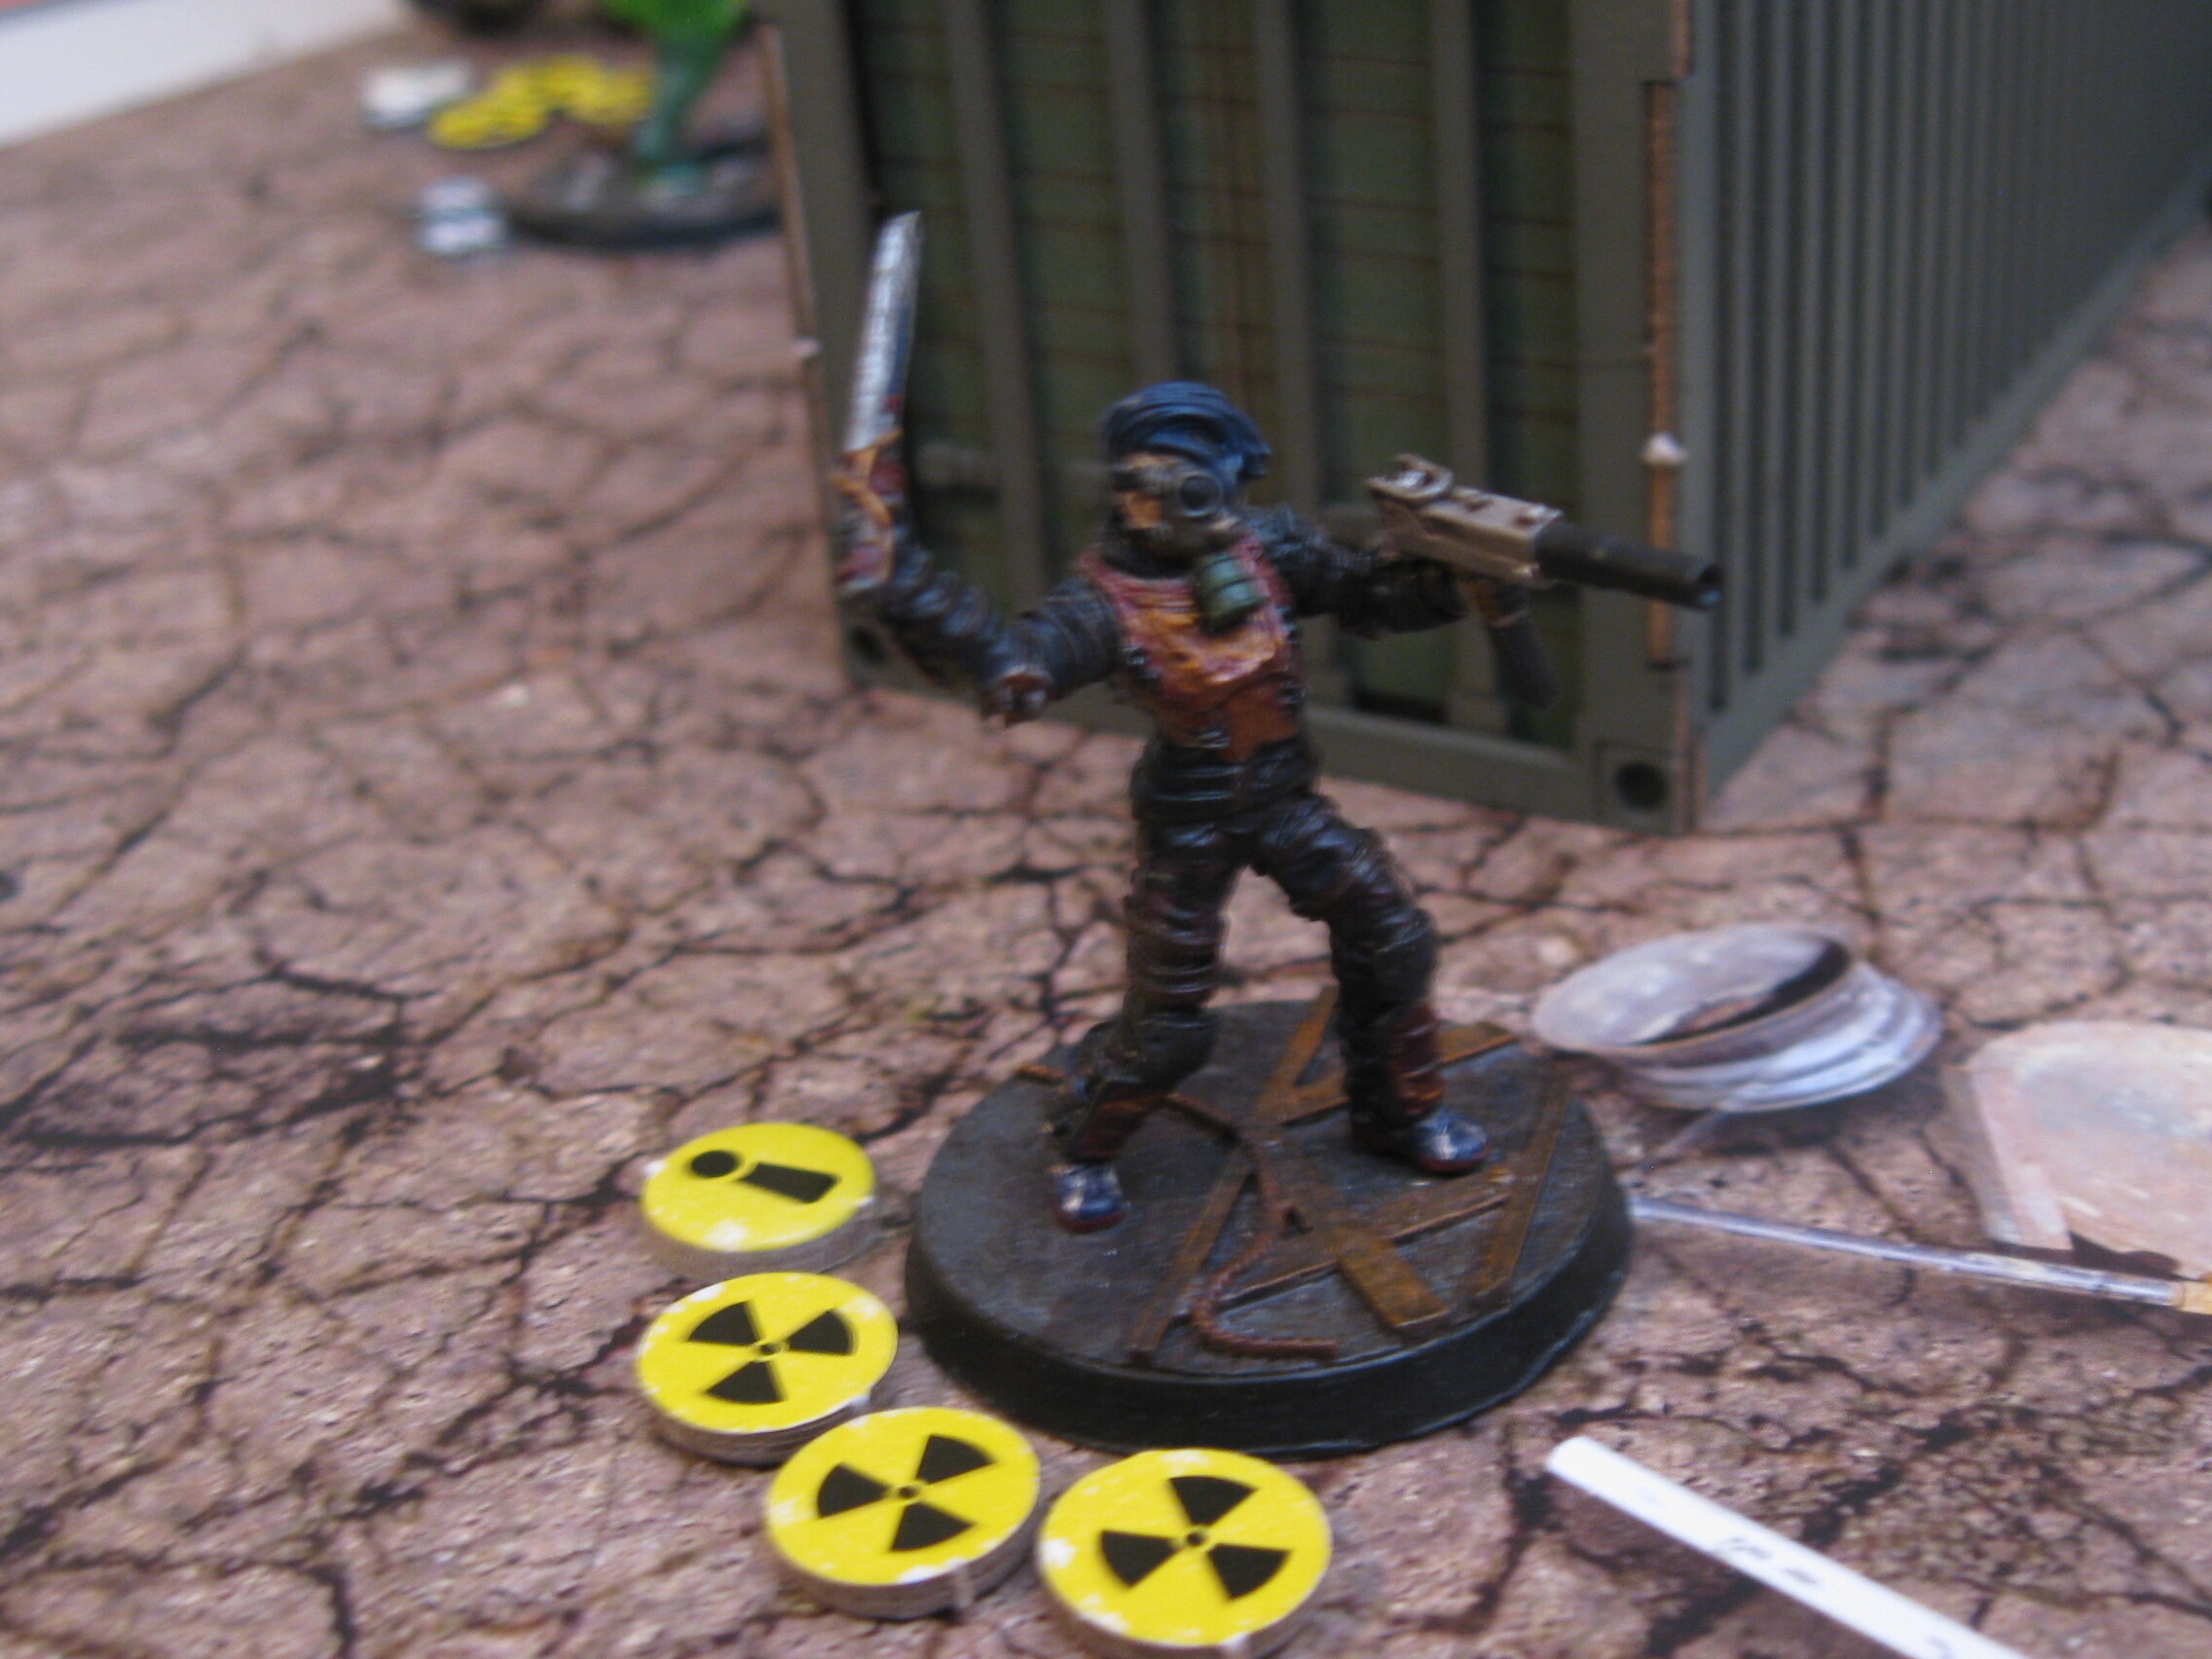
The doors of the shipping container burst open, and the enslaved tech is knocked back orange distance as Ada the automaton bursts out with her energy shield fully activated, and darts off towards the mercenaries!

Ada is a heavily modified assaultron, and her normal assaultron head laser has been removed. She instead has a chargeable energy shield powered by the two fusion cores attached to her back. One action must be spent to charge up an armor token, to a maximum of only two, and the armor tokens are only able to block energy damage.

Round 7: An artillerist (likely the one who placed the artillery signal flare from round 3 on the roof there) spawns in, and in typical Fallout fashion, runs right up to the nearest NPC to lock them in dialogue. The Sharpshooter moves to base contact to engage the bloated glowing one, and is quickly knocked out, as Ada moves in to help take out the bloated glowing one. In hindsight, I also should have had someone on the mercenary team test charisma for Ada to join them, but the thought just never even crossed my mind until after the game was over.

Round 8: The power armored raider has to test presence to shoo the artillerist away, which had a surprisingly fair chance of not working despite the raider being clad in a big, gnarly mech suit. The mercenaries continue to fight the bloated glowing one, as the rest of the Rust Devils convene in on Ada, anxious to strip her of all her fancy modifications. Luckily, not long after I drew the lightning storm event card, do I roll a star and can immediately discard it before any more of my precious mercenary crew gets knocked out.

Round 9: The Shi Warrior realizes she can score a few quick shots against the enslaved tech, who has foolishly ducked for cover within her line of sight. The Ranger heals the Commando before he completely runs out of health, while Ada loses her energy shield to stray blasts from the protectron. The power armored raider, annoyed at having to deal with the artillerist, takes cover and prepares to open fire at long range. The scavver, having been out of range to hit anything for the past few turns, makes his way around towards the shipping containers.

Round 10: The power armored raider attempts to throw a baseball grenade into the fray, but misses. Meanwhile, the mercenaries realize they could end the match right now by taking out the protectron, so they shout for Ada to target the protectron instead, and in two shots of the laser rifle (plus an SMG burst from the Shi Warrior) the protectron is down and the match is finished.

Conclusion: realizing all of their robot followers have been destroyed, the Rust Devils turn tail and run before they start taking human casualties.

As the Ranger is finally able to revive the Sharpshooter, the rest of the gang plus Ada beat the radiation out of the bloated glowing one until it finally stops moving.

Ada thanks the mercenary crew for the rescue, and explains she was being chased across the wasteland for two weeks by Rust Devil raiding parties looking to turn her into scrap. She then tells how she hails from a far away land known as the “Common Wealth”, and bears a secret priority message for the local Brotherhood of Steel chapter. The mercenaries explain the local BoS chapter hasn’t been seen in months after they were driven out of their base by several super mutant tribes. They offer Ada a spot on their mercenary team and a promise to help find whatever Brotherhood remnants might remain, and she accepts.

While they might not have gained any more caps than they started the day with, the mercenaries march proudly off into the wasteland with a new friend in tow and a new mission.

In hindsight, there was quite a lot I forgot to do, or did wrong, or totally overlooked in this match. The pair of glowing ones actually wound up being way stronger than I was anticipating, and went from what I thought would be ambient filler enemies to full on boss mobs. I also didn’t even notice the “test radiation damage on everyone near them” bit that they have on their unit cards, but I feel like this match would have ended a lot quicker if I did.

Ada uses the base Assaultron card, which probably makes her waaaay too overpowered. Unfortunately, I only have one Battered Assaultron card, so going forward the mercenaries are either going to be squaring off against full strength Assaultrons, or they’re going to have a game-breaking one bot army following them around. It’ll probably be the former, just cause I’m starting to thing the mercenaries might be a bit overpowered anyhow.

There were also, again, lots of skill checks I didn’t think to do. I probably won’t try to use any sort of ‘revive’ mechanic going forwards, and I’ll just let the mercenary models be removed from play (but not officially killed off). When I use them in a scenario next, I’m also going to have them use the archetype cards from the RPG instead of standard FoWW cards, because not having those raider cards to work with is also quite annoying.

That’s all for now, stay tuned for this month’s game!

4 Likes

I really enjoyed reading them. Thanks for posting. Lovely terrain. Please keep them coming.

1 Like

Because it’s #falloutfriday today, and I was feeling rather festive, I decided to try running something a bit different for this month’s game.

One of my absolute favorite locations in Fallout 4 (and maybe any Fallout game I’ve played through) was Easy City Downs, which for those of you who don’t know, was a robot racetrack run by the Triggermen.

Unfortunately, like the Combat Zone, there’s little to no actual interactivity with this otherwise really fun and interesting location. Both Easy City Downs and the Combat Zone really added a lot lore-wise to both the Commonwealth raiders and the society in the Commonwealth as a whole, but the only thing you can do in these two locations in-game is just… shoot everyone there. I felt it was such an under-used location, especially considering the Automatron DLC. There could have been a fully interactive robot racing course you could take Codsworth or Curie or Ada to and have them compete against other robots, but instead it was just another shooting gallery.

One of my favorite things about Fallout Wasteland Warfare, however, is I can take these underused ideas and play them out to the fullest!

Scenario Synopsis:

While the mercenaries might have made a new friend, they were still running dangerously low on caps. If they didn’t land another job soon, they’d have to start robbing settlers for food, and they weren’t ready to become raiders quite yet.

By some stroke of luck, a passing caravan takes note of the heavily modified assaultron among them and mentions a local racetrack nearby that runs weekly qualifier robot races for the regional racing circuit. With great haste, they make their way over.

The clerk, a snappy city-type, probably a Triggerman or an Operator by the looks of him, explains to the gang he’s shorthanded on contestants for the week, so he’ll waive the registration fees. Tickets to watch will still cost them, however.

At the starting line, they notice one of the Rust Devils they encountered previously glaring at them while making last minute adjustments to a heavily armored protectron.

The gang makes their way into the camp. Guards wearing sleek leather jackets and ties fashioned to look like old pre-war suits watch them from every angle.

The team decides to split up until the race starts. The Sharpshooter and Ada talk to one of the Triggermen running diagnostics on an old protectron.

“Normally I’d charge for a tune up, but I’d kill just to get a look at a custom job as good as this one!”

The Ranger takes the last of the team’s caps to the general merchant to stock up on whatever supplies they can afford, while the Commando and the Shi Warrior ogle over the weapons merchant bot’s selection.

“Me and Sputnik been running races for years! We no win much, but we still have fun!”

Eventually, the contestants start to make their way onto the track to prepare for the race.

The Rust Devil is running one of their signature custom automatrons. While protectrons are an unusual choice for an all-robot race, he boasts his has been outfitted with special servomotor enhancements.

The rest of the lineup includes Sputnik the eyebot, a veteran of many races and a local favorite, and a Ms. Nanny owned by a vault dweller and his mechanic. The gang recognizes him as a wealthy caravan owner from the city. The remaining protectron and assaultron are owned by the management, and added in to fill up space on the roster and to keep things entertaining.

Scenario Details:

Because each different robot class moves differently, a simple move-by-move race on an empty track would be rather dull, and with a mixed assortment of robot racers, it would be pretty one-sided. Assaultrons and Mr. Handies both move red distance with green charge, whereas eyebots only move the typical yellow distance with red charge. Protectrons are even slower, with them both moving and charging at only yellow.

In order to keep things balanced, I’ve devised a few simple rules for racing using only the range rulers and the blue special die. Each turn, a model must roll the blue die to check if it gets a “burst of speed”, meaning it can use it’s charge distance to move instead of it’s regular movement distance. This is achieved by rolling a :star: star on the blue special dice. Models that roll the :star: :star: double star face get to use their charge distance for both of their move actions.

In addition, instead of a flat oval track, I’ve built a sort of obstacle course for the robots to run through, which has the robots weave through tight spaces, forcing them to use their speed boosts with more tact. It also has several clumps of rough terrain, which according to the FoWW rules, models must move one color slower through.

However, even with the “speed boost” rules, and with difficult terrain factored into play, the movement abilities of the robots are still very stratified, and results still heavily favor Mr. Handies (who both ignore the difficult terrain penalty on account of hovering, and move red distance by default). To balance things out, for this match specifically I have added in a special handicap rule where the participating Ms. Nanny is forbidden for rolling for speed boosts, as she is already moving red distance around the map unimpeded by difficult terrain.

In addition, for both narrative and gameplay reasons, the Rust Devil protectron can test speed boost for green distance, as he is heavily modified and protectrons have no charge movement distance bonus to begin with.

Finally, the prizes for the contestants are as follows: 250 caps for 1st place, 100 caps for 2nd place, and 50 caps for 3rd place. Also, since this is a ‘qualifier’ race, 1st, 2nd, and 3rd place winners get to compete in professional races further down the line if they choose to.

Oh, and this is a two-lap race.

3 Likes

After a very long and drawn out explanation of the rules to the audience, the referee nods to the radio DJ hidden away in the far radio tower to start his broadcast.

And with a shot of his pistol, the racers are off!

Round 1: The racers rush forward into the first section of the course, the rock garden. Some of the red-movers get bunched up in front of the first rough terrain obstacle, while the slower yellow-movers and the basic assaultron take a more cautious route around it.

Round 2: The Rust Devil protectron gains several speed bursts early on in the game, as the racers make their way towards the car lot.

Round 3: The racers weave their way through the car lot, with the Rust Devil protectron maintaining an incredible string of speed boosts. Meanwhile, Sputnik the eyebot and the red protectron already start to fall behind.

Round 4: Ada lands a solid boost and pulls ahead of the pack, while Sputnik and the protectron lurch their way through the cars.

Round 5: Ada wisely takes the back alley through the junkyard, but the Ms. Nanny fears no obstacle.

Round 6: The Rust Devil protectron’s winning streak of speed boosts has evidently left him, as he now struggles to make his way through the junkyard’s alley.

Round 7: The Ms. Nanny, Ada, and the assaultron cross the finish line completing their first of two laps around the course! The Rust Devil protectron is hot on their heels, however, and hasn’t given up quite yet.

Round 8: The red protectron really is not cut out for this kind of high-speed racing, but Ada and the Ms. Nanny sure are.

Round 9: Despite the Ms. Nanny’s relentless speed, Ada and the assaultron keep the pressure on her, as the Rust Devil protectron really feels his luck has ran out.

Round 10: Ada takes the lead as the red-movers emerge from the cars for a second time. As the audience cheers him on, the red protectron finally finishes his first lap.

Round 11: The Ms. Nanny takes the lead back as they round the corner into the junkyard, while the Rust Devil protectron finds himself completely alone between the cars.

Round 12: The final stretch. The end of the second and final lap will be resolved within the next turn, and both Ada and the Ms. Nanny are poised to win.

Rules: Because the winner could be either one of these two models depending on whichever one I place over the finish line first, I’ve decided to roll a d12 for initiative between the Ms. Nanny, Ada, and the other assaultron for who gets to move first and (potentially) win 1st place.

Round 13: The other assaultron rolls a 12, winning first move, but unfortunately, no speed boost necessary to potentially win.

Ada rolls a 6 and passes a speed boost check, which is just enough to get her across the finish line in one round. But ultimately, it wasn’t enough to steal first place away from the Ms. Nanny and her higher initiative roll of 9. A win is a win, however, and Ada wins a respectable 2nd place!

Conclusion: Because the Triggermen really don’t want to deal with another angry Rust Devil upset they lost to one of the management’s robots again, they hand him and his protectron 3rd place and the 50 cap prize. But, for running a close race against a superior opponent, Ada wins 2nd place and the prize of 100 caps on behalf of her newfound mercenary friends. And, to no one’s real surprise, the Ms. Nanny’s demonstration of superior speed and General Atomics engineering has won her 1st place and the 250 cap prize!

The crowd cheers. Yaaaay.

This was a very fun, and adequately fast scenario. A single blue die role and two movement actions per model makes for really quick gameplay. However, in future robot races held by me or anyone else, the contestants should definitely be limited by robot class, or at least by base movement speed. Even with a gimp, the Mr. Handy models can still very easily win against any other robot model, and the basic protectron and eyebots were left completely in the dust. I can see protectron and eyebot races or assaultron-only races being much more balanced.

Still though, this was a lot of fun, and I encourage all other robot enthusiasts to run their own race scenarios too!

Happy #falloutfriday !

3 Likes

That was alot of fun , thank you for sharing. Maybe adding a danger element to it, could create a race where the protectron could be more competitive. Such as carrying a heavy load or going thru a burning inferno. Or clatter of rifle fire.

1 Like

I was considering adding a minefield section, or some other unit-damaging map hazards, but I figured I’d just keep it simple this time around.