Alaiteir's painted minis

So I unexpectedly had to move places since my last update here, and my new room doesn’t have the space to be able to do modelling and so on. However, someone opposite me in the hall left last week, and I’ve been able to temporarily commandeer it for painting purposes until someone moves in to replace them, so I’ve had the chance to get this building finished!

I ended up having to cut a lot of the planned details due to time/budget constraints, but overall this terrain piece cost about £8 in total. Not super cheap, but it definitely adds a lot to the battlefield compared to my other building!

Haven’t been able to afford any more minis since my initial pre-order way back last year, but hopefully the ones I’ve got suffice for beauty shots :slight_smile:


WP_20190728_15_57_53_Pro
WP_20190728_14_19_43_Pro
WP_20190728_15_29_10_Pro1

10 Likes

That looks great :+1: :smiley:
You might have cut out some of the details but it isn’t suffering for it, looks spot on for FO ruins!

1 Like

Thanks! :smiley: I’m really pleased with the effect I’ve managed to get on the wallpaper, and I can always go back and add details later.

I learned a lot while making this piece, I’m hoping I’ll be able to transfer things to future projects to make them even better!

3 Likes

The last picture should be used as adertiseen for the game. :slight_smile:

1 Like

Thankyou! :smiley:

Hey Alaiteir, I like your work and was wondering how you shade your minis

I use the army painter washes and they come out looking very dirty even after using the soft tone wash I know it sort of fits with the theme but, I prefer for them to look less dirty… and more like yours.

1 Like

Hi Weller! There’s a couple of different techniques I use, I’ll try to break them down :slight_smile:

In terms of paints I use citadel (Games Workshop), simply because they’re the paints that my local hobby store stocks and they’re the ones I’m most used to. I haven’t really tried others, but I’ve heard Army Painter, Vallejo, and the newer range by Green Stuff World are all pretty good.

For something quick and simple, I’ll just apply a simple black or brown wash, but I’ll water it down and apply it extremely thinly (either by using some tin foil as a makeshift palette and mixing water in, or by dipping the tip of the brush in water for a moment after I’ve loaded it with the wash). You can always go back and do an additional wash once it’s dried if the first wasn’t dark enough. I’ll mostly use this on smaller details, things like thin straps and pouches, but sometimes also on larger areas if it gets the right effect. With washes it’s worth being aware that they usually work best on smaller areas, or areas with lots of texture. On large smooth surfaces washes can sometimes pool in unexpected ways, but that’s usually only an issue on things like large vehicles and terrain pieces.

The other main technique is much more time consuming, but it’s worth it for what you can achieve (in my personal opinion). Essentially, you start by layering the colour you want the shadows to be, then apply successively lighter layers on the increasingly lit areas. This can be done in a number of ways, but usually I’ll do it by applying the layers as glazes to make the transitions between dark and light smoother. The proper way to make a glaze is by mixing unpigmented paint medium with your colour of choice, but I find just mixing in a bit of water (again often by simply dipping the tip of the brush in water after loading it with paint) does the job fine enough.

For this technique, using thin layers is cruicial to avoid losing detail. It’s difficult and takes a lot of practice, but it gives you complete control over how lighting and shading looks on your mini. I’m working on a project that will hopefully give me a chance to really showcase this technique, but if you’ve got any questions on minis I’ve posted already I’d love to hear them :smiley:

Just a little tidbit for the watering down of colors:

Something I do is I’ll take a water bottle cap, like from the small water bottles, and I’ll put a few drops of paint in those to use, or in the case of washes, a few drops of wash and water it down as needed if I so choose. Makes a free and easily disposable paint tray. Can use soda bottle caps too, but those are quite a bit deeper than the cheap water bottle ones. If I remember, I’ll take a picture and mention it next time I do some modeling.

1 Like

Thanks for the advice guys, I didn’t think of watering down the washes. I ended up buying some quick shade mixing medium, haven’t tried it yet but im hoping it will dilute the wash. Also… I was thinking if for example I paint Nora’s trousers blue, would a blue wash be advisable?

3 Likes

After the basecoat, most layers I put on will be thinned at least slightly compared to how they are in the pot. It’s not absolutely necessary, but I find it helps keep the fantastic level of detail on the resin mini’s :slight_smile:

As for which wash to use on Nora’s trousers, that depends on what kind of effect you’re after. A blue wash will make the blue colour more intense, and may do some mild shadow effects if the blue wash is darker than the blue you’ve already used. If you’re already happy with the blue you’ve achieved and it’s mostly shading/shadows you’re wanting to add, then a black wash is probably best

2 Likes

A teaser for what I’ve been working on lately…

4 Likes

Love all your work, dude. Some truly inspiring stuff.

1 Like

Thankyou so much!

The raiders are coming!

For my miniatures purchase of this year, I’d been saving up, and managed to pick up the raider bundle when it was released. I don’t currently have space to set up my modelling things, but I didn’t want to wait on painting the raiders either. I decided therefore to save the named characters and power armour until I move flat again, when I’ll hopefully have space to work on things properly. I could still get some paint on the bulk of the raiders though!

I wanted to have a go at really nailing the faces on these minis, so took a lot of time shading and highlighting the skin tones (particularly on the cheeks and around the eyes). Let me know what you all think of them :slight_smile:


I love the scenic bases Modiphius include with each set, they really tie each mini into the setting. I couldn’t quite get the colours to come out in the pictures (using a half decade old phone for all of these), but I tried to paint reflections of light on the broken glass and get some heavy rust colours where appropriate

A psycho about to pounce on an overly curious settler

Nora outnumbered:

A psycho and scavver, standing among the ruins the war left behind:

9 Likes

I was thinking about doing a post going over the paints and brushes, and maybe some of the techniques, that I personally like to use, if anyone would want to see that?

As always I’m happy to answer questions/give help if I can! :slight_smile:

4 Likes

Awesome work as always!

You’re attention to detail on the faces really paid off - simply brilliant!

1 Like

Those look absolutely brilliant! The faces have really come out well, I’d say the extra time has really paid off :grinning:

1 Like

Thanks! :smiley:

One of the things I’m loving about this game is that there’s no need to paint up loads of models if you w

ant to have a decent sized match, so I can really go to town on each figure. That said, even though the raiders set is the only core set I’ve got so far, I think I’ve still managed to get quite a good range of minis!

4 Likes

So, tools and techniques. These will vary between modellers, depending on needs, preferences, budgets, etc. What’s good for one person won’t always be good for another.

In terms of brushes, I find it’s worth splashing out on more expensive ones, because the painting aspect of the hobby is a really big part of it for me. My brush of choice is a Windsor and Newton Series 7, size 000 (pictured on the right). It’s not cheap, but the sable hair is much nicer to paint with than synthetic, and it holds its point really well (how well a brush keeps its point and doesn’t lose its shape is key to how much use you can get out of it). I’ve had this brush for almost a year, and it’s only now starting to fray and need replacing. The other brush I have is a Citadel Layer brush, also sable hair, that I use for larger areas and undercoats.

image

As a comparison, here’s a picture of a cheap synthetic brush after just one morning’s use:

image

Other equipment I have is a sharp hobby knife from Greenstuff World, and a “palette” (whatever convenient usable surface is nearby, most recently the back of the box for the Mysterious Stranger). I’ve got some other things I use when working on terrain, sculpting my own minis, etc, but I haven’t been able to get those out since moving to my current flat so weren’t involved with the raiders above.

In terms of paints, this mostly comes down to personal preference. I currently use Citadel paints, as I like the quality and I can get them locally, but other brands like Greenstuff World, Vallejo, Army Painter, etc, are all supposed to be just as good.

2 Likes

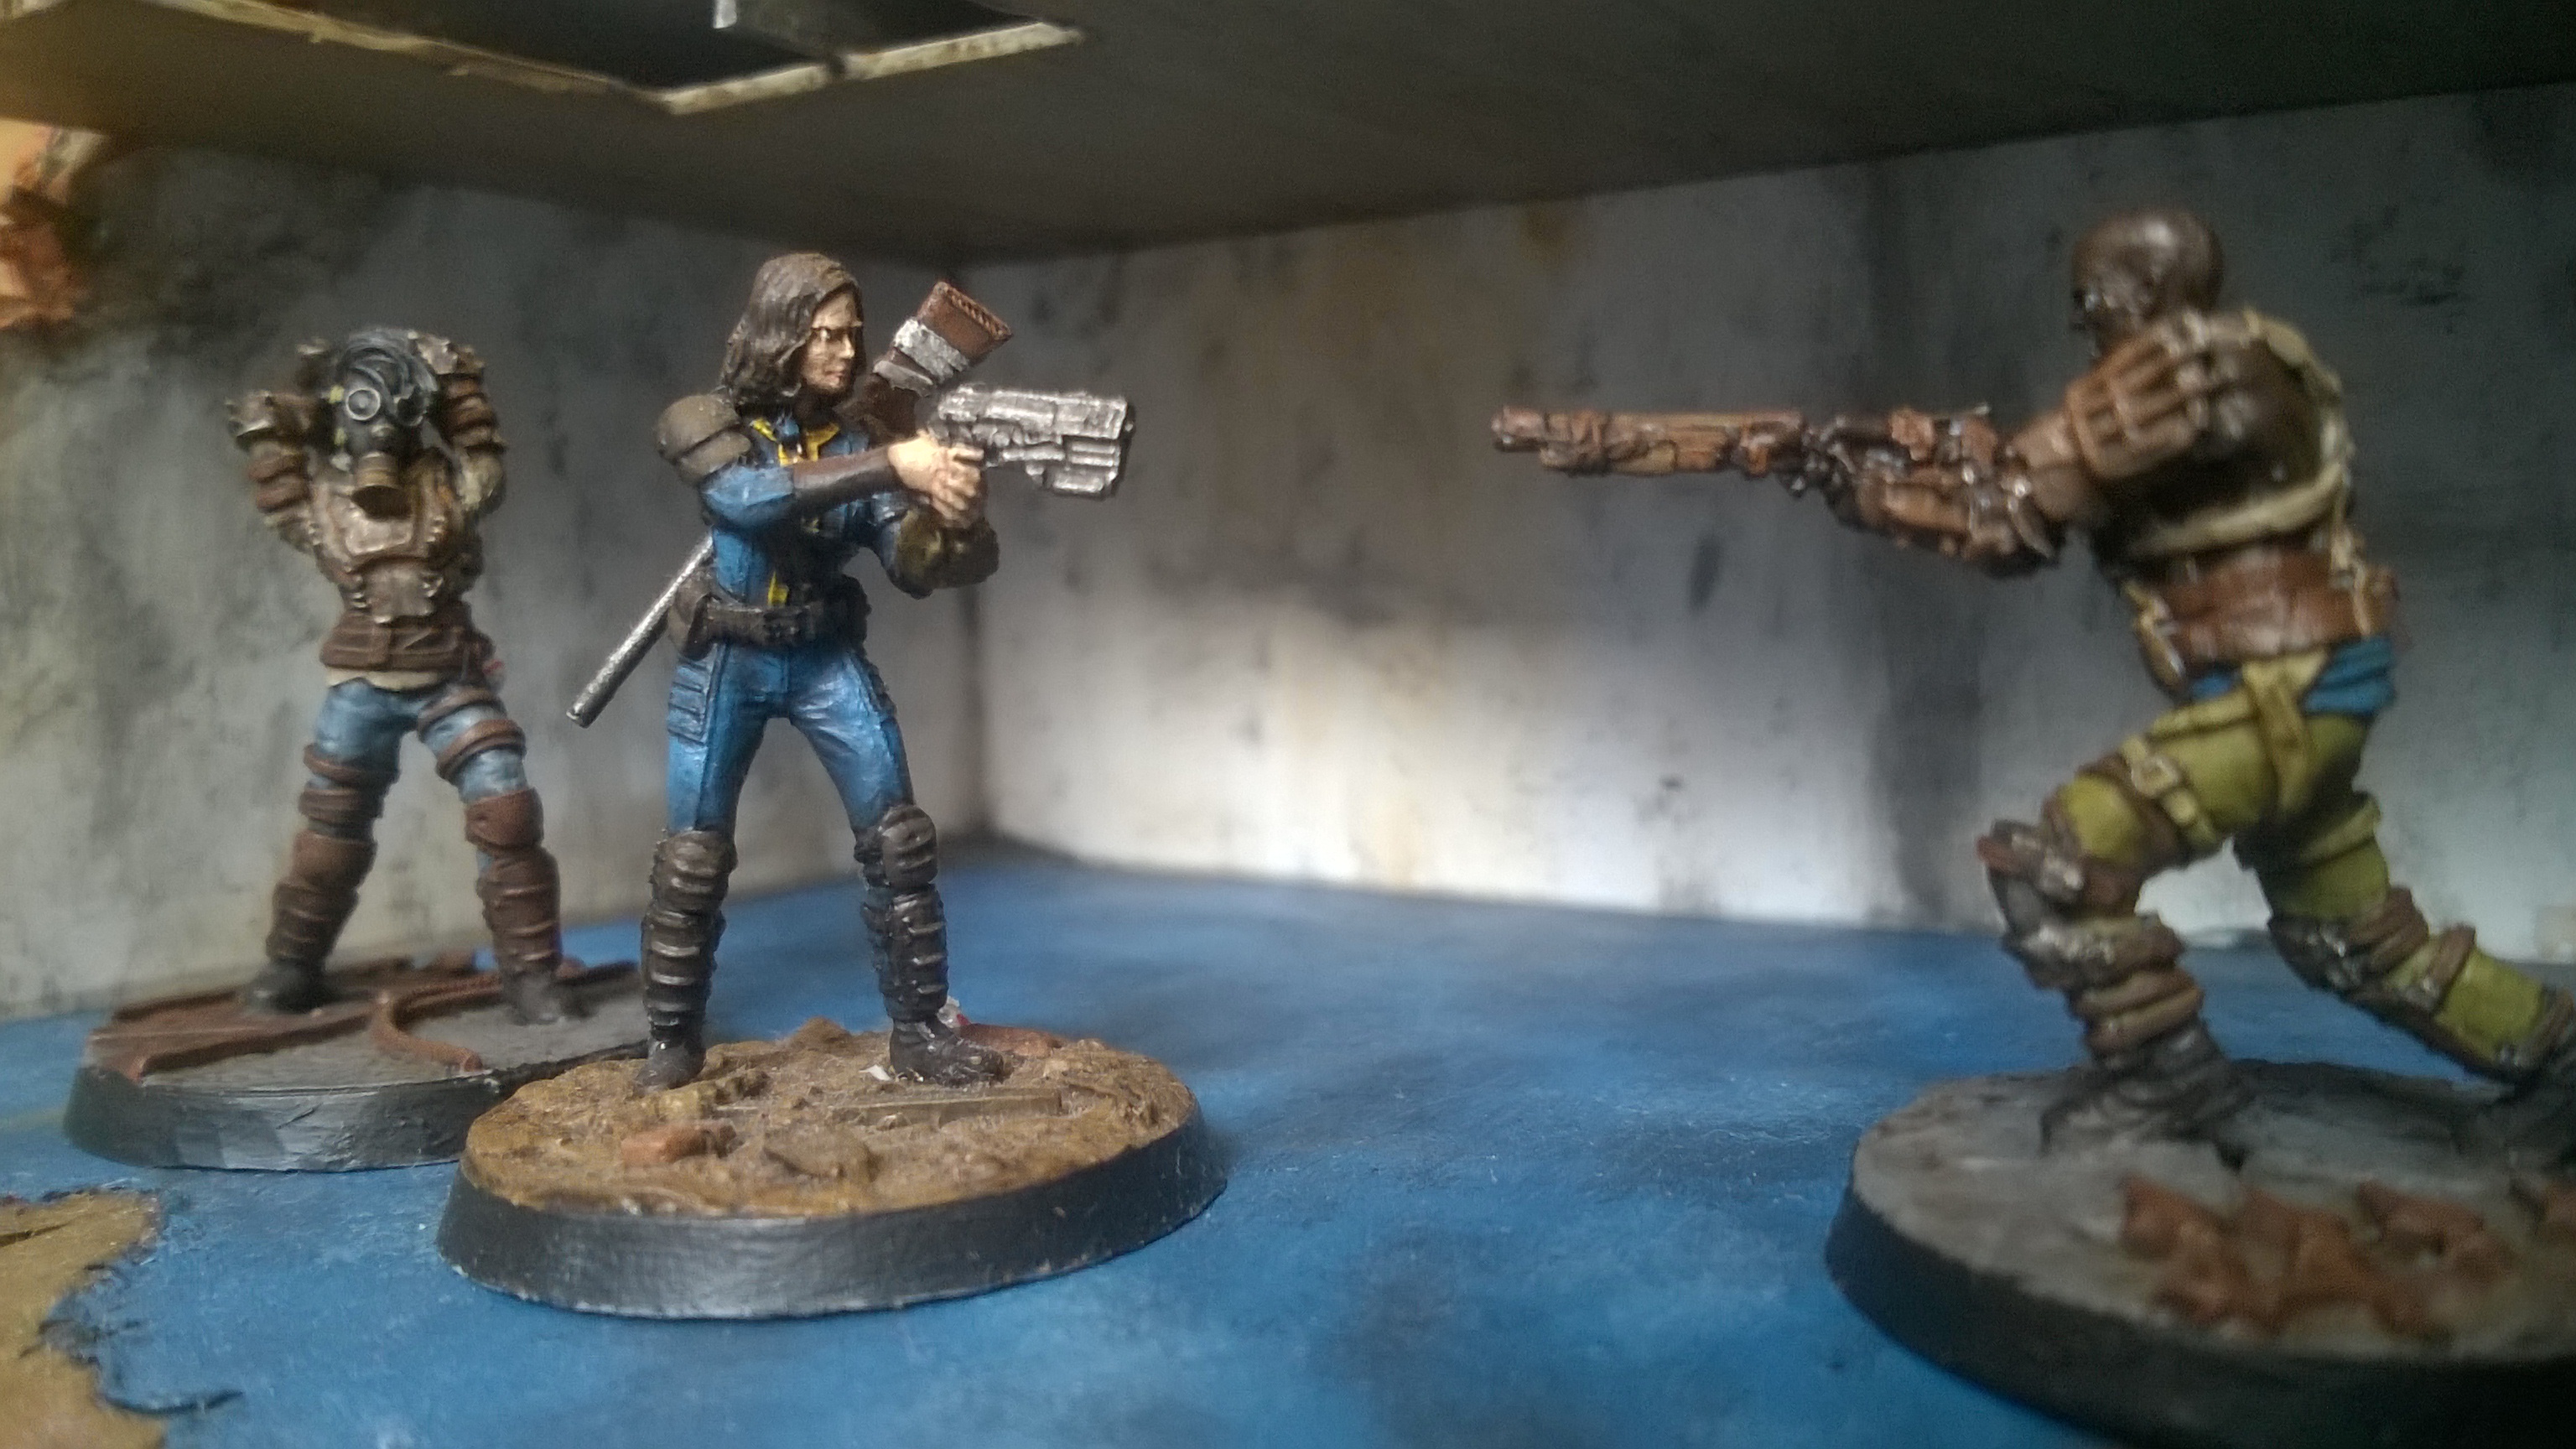
Now, for painting techniques. Again, everyone has their own personal preferences, and that’s part of what makes this hobby so much fun. I tend to towards fairly dark tones, aiming for what I personally think is realistic, but that style’s not for everyone. Some people prefer much brighter/more vibrant colours, and those can look great as well. The general techniques should be fairly interchangeable though.

Priming. Simply put, it goes before all other painting, and makes paint stick to the miniature. I use black, but if you want a brighter mini you can use white or grey for this layer. Some people do something called zenithal highlighting, where you start with a dark undercoat and then gently spray a white layer from above. I haven’t tried it myself though, so can’t say how well it works.

Layering. This is just using a brush to apply a simple coat of colour. Once your mini is primed, layering on base colours is usually the next step. Although it can mean having to do multiple coats, thinning out the paint slightly with a tiny bit of water can help with showing off the detail, especially given how detailed the Fallout minis are. Several thin layers are generally better than one thick layer. For me personally, I usually choose colours that are quite dark, ready for the next technique.

Glazing. Glazes are essentially the same paint you’d use for layering, but heavily thinned down (enough that a small amount is translucent, but not quite as thin as a wash). To do this properly, use paint medium (essentially paint but without the pigment). I use water because I’m broke, but medium is supposed to be much easier to get nicer results with. Use glazes on areas where you want to transition from one colour to another. On things like the raiders faces and musculature above, I would start by layering a fairly dark version of the skin tone, and then use successive glazes to lighten it on the areas that would be caught by the light.

Washes. When I first discovered these, I thought they were magic. A quick black or brown wash is a great way to add shading and dirt to a miniature without having to go to lots of effort, and they can be further thinned down with a bit of water if the initial effect seems too harsh. I personally don’t wash the whole model and apply them instead just to particular parts, but you can apply washes to the whole model for a quick way of shading it all. You can also use washes to subtly alter the colour of something, such as if you want something to be more blue or more red without completely changing the original colour. If you were wanting to give the impression of moss growing on something, for example, a green wash in the recesses could help with that.

Edge highlighting. I don’t tend to use this technique as much as I used to, but it’s still got its place on some things. A highlight is just applying a lighter version of a colour to areas that would be less in shadow, and an edge highlight is just this but along the hard edges of something. Take your time to get the line smooth, and use mostly on solid objects like armour plates and so on.

Right, I realise this is a lot of information, and I haven’t got pictures to demonstrate any of it. Hopefully it explains the key techniques I use most though, and as always if anyone’s got any questions I’d be happy to answer them :slight_smile:

5 Likes