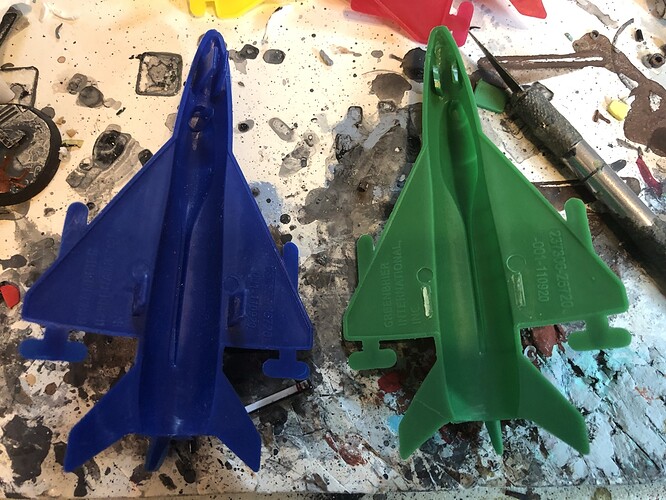
I sometimes tag along on trips to Dollar Tree and keep an eye out for cheap junk I can use for crafting projects. This time I spied some “Favors-Surprises” el-cheapo plastic toy “jet fighters” in baggies. Dollar Tree is a US chain where everything is $1 (no price tags required!) plus tax, so it wasn’t like I was making much of an investment on this project.
My gambit was based on the observation that these cheap toys were detailed only on one side, with essentially flat backs – so flat, in fact, that the “wing-mounted rockets” are fused with and on the same plane as the wings themselves. Upon closer examination, I saw there were several different designs – some packs had a variety, some had all of the same type. One design had tail fin and aileron tips that went back the same apparent distance – and I imagined that if I stuck two of these flat-bottomed “jets” together, I’d end up with a rocketship-like construction that could stand on its tail-fins like an old pulp-adventure sci-fi rocketship.
First, I had to make sure those surfaces COULD be put together. The only details on the reverse side to speak of were tab-like shapes to serve as “landing gear,” raised print (MADE IN CHINA, etc.), and, oddly, a bit of a rim around the edge of the wings (so as thin as the wings were, they still had a shallow recessed interior). Also, the plastic was a bit warped, and it did not seem that dipping in hot water would help much (not that I fully explored this at all), so I used some epoxy putty beads inside the hollow spaces of the wings and nose cone to give more of an anchor point for super glue to bond the halves together, and used paper binder clips to hold the facing wing and aileron sections while the glue dried.
Assembling the “starfighter” was relatively straightforward. I used a Dremel cutting edge to chop out a section of the canopy for a “cockpit,” and then a boring tool to make a hole near the base for an access point (for an imaginary 32mm scale kid to crawl inside the playground equipment, or peek out the oddly-placed “hatch”).
The “rocketship” was more problematic. I chopped off the wings, but this resulted in a long “slot” along the sides of the fuselage where the wings would have been. I decided to bore windows/hatches onto both sides of the “rocketship.”
I used epoxy putty (Apoxie Sculpt in this case) to do some more gap-filling. I used two sections of sprue to plug the slot in the side of the rocketship, but in retrospect I could’ve done better with a couple of coffee stirrer sticks or some cardstock or something thin like that.
The toys were made of a rigid plastic that (to my relief) held up to spray-on primer without any trouble.
Next, I just spattered on some paint, and drizzled on some wash, to make a passable bit of rocketship-themed playground equipment. I added a stepladder piece from a “bitz box” – unknown origin – but otherwise I suppose kids could just crawl in through the exhaust in the bottom, or clamber over the fin.
Here’s the finished “starfighter.” I tried to make it a little more patriotic with some red-white-and-blue stripes in the middle, US markings on the wings, and then a “flying tiger” design on the nose.


